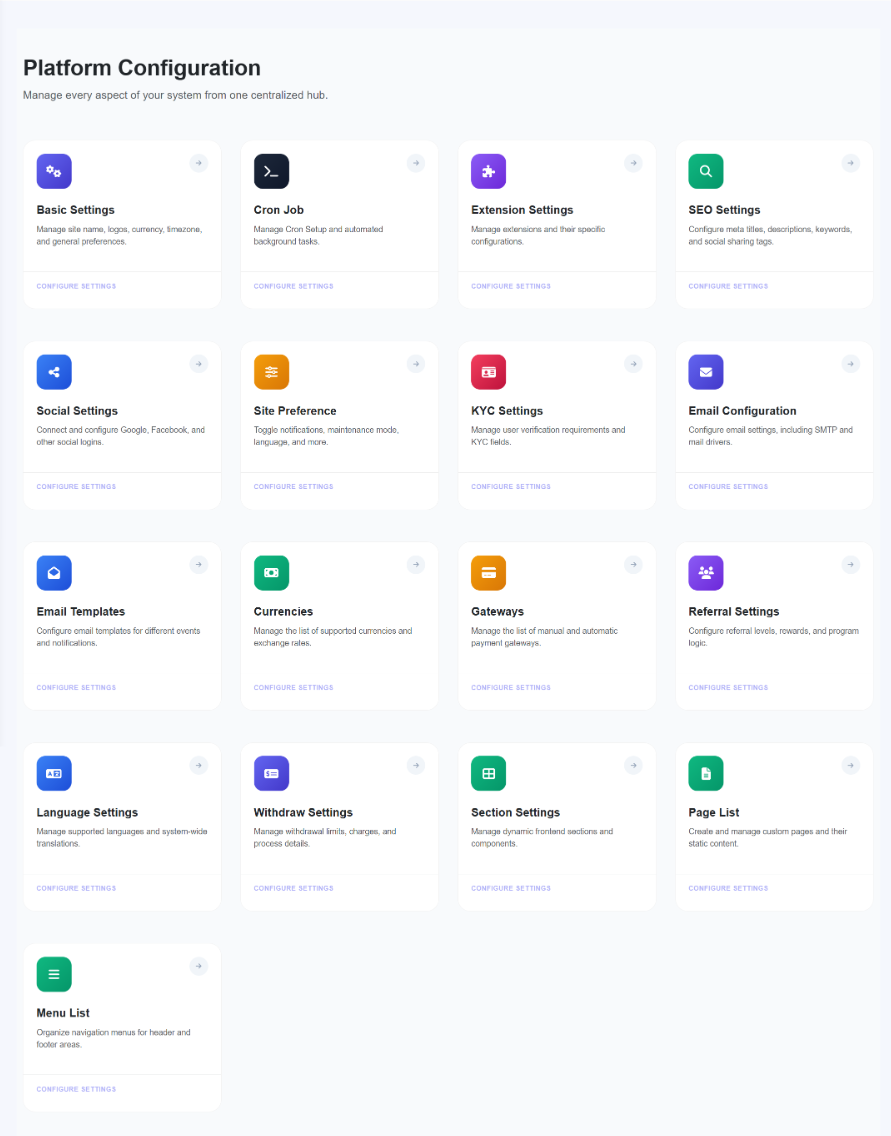
Platform Configuration
1. Basic Settings
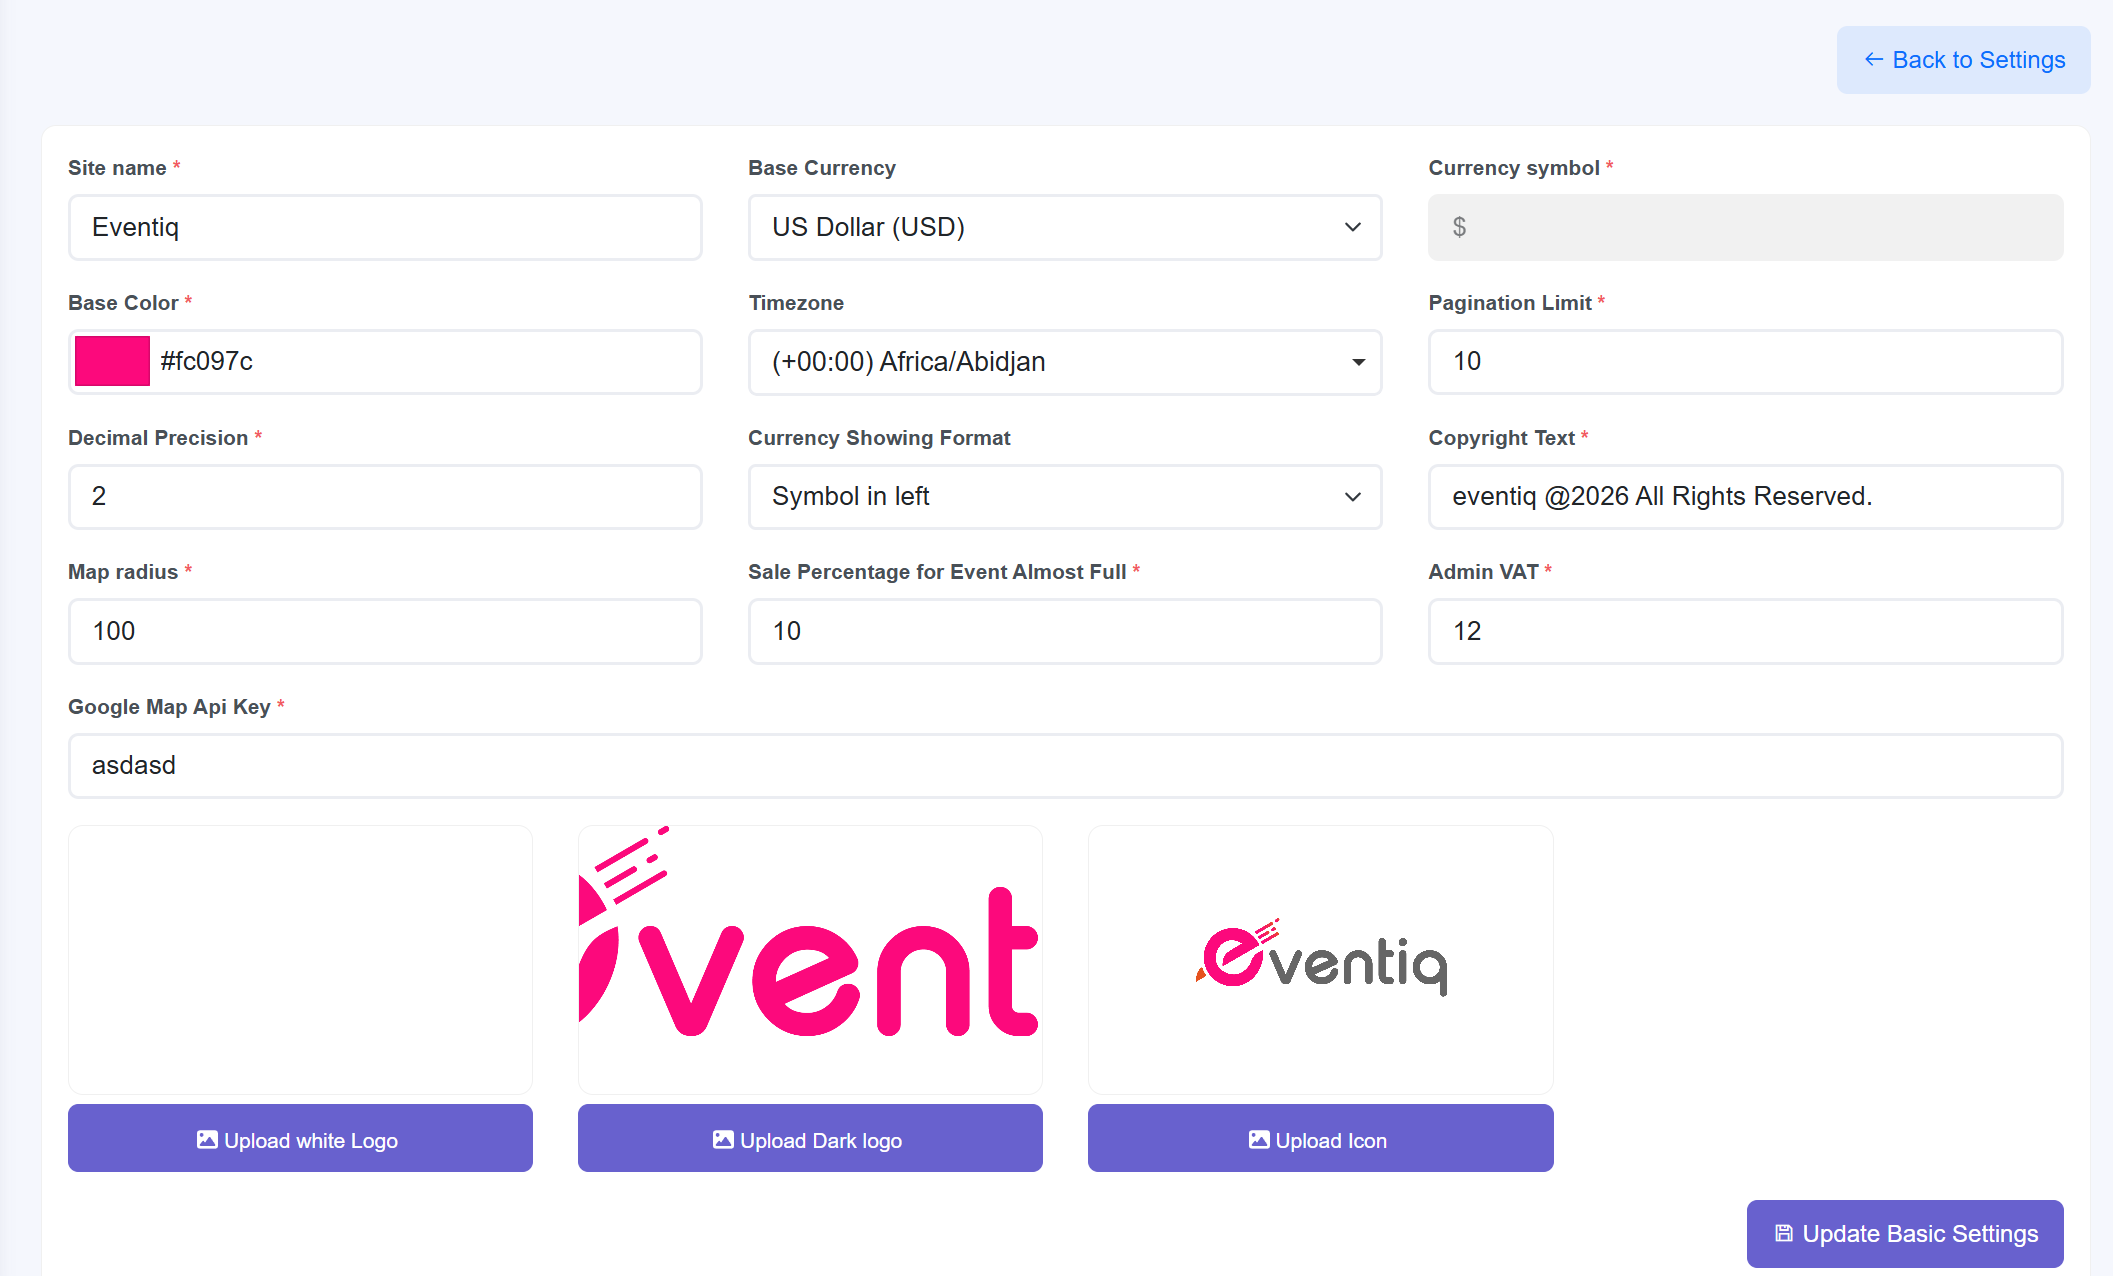
The primary control center for site identity. Configure the site name, branding colors, timezones, and global financial logic like Admin VAT and decimal precision.
Interface Detail Analysis
- General Branding: Configure the Site Name and define the primary Base Color using a custom HEX color code.
- Currency & Locale: Select the Base Currency, define the Currency Symbol, and choose the preferred Currency Display Format (e.g., symbol on left or right).
- System Logic: Set the system Timezone, configure the Pagination Limit for records per page, and define the Decimal Precision for numeric values.
- Legal & Financial: Customize the Copyright Text and configure a global Admin VAT / Tax Percentage.
- Operational Parameters: Define the default Map Radius and set the Event Almost Full Threshold Percentage to trigger frontend availability alerts.
- Integrations: Provide a Google Maps API Key to enable location and map services.
- Visual Assets: Upload branding assets including the Light/White Logo, Dark Logo, and Favicon (Site Icon).
2. Cron Job
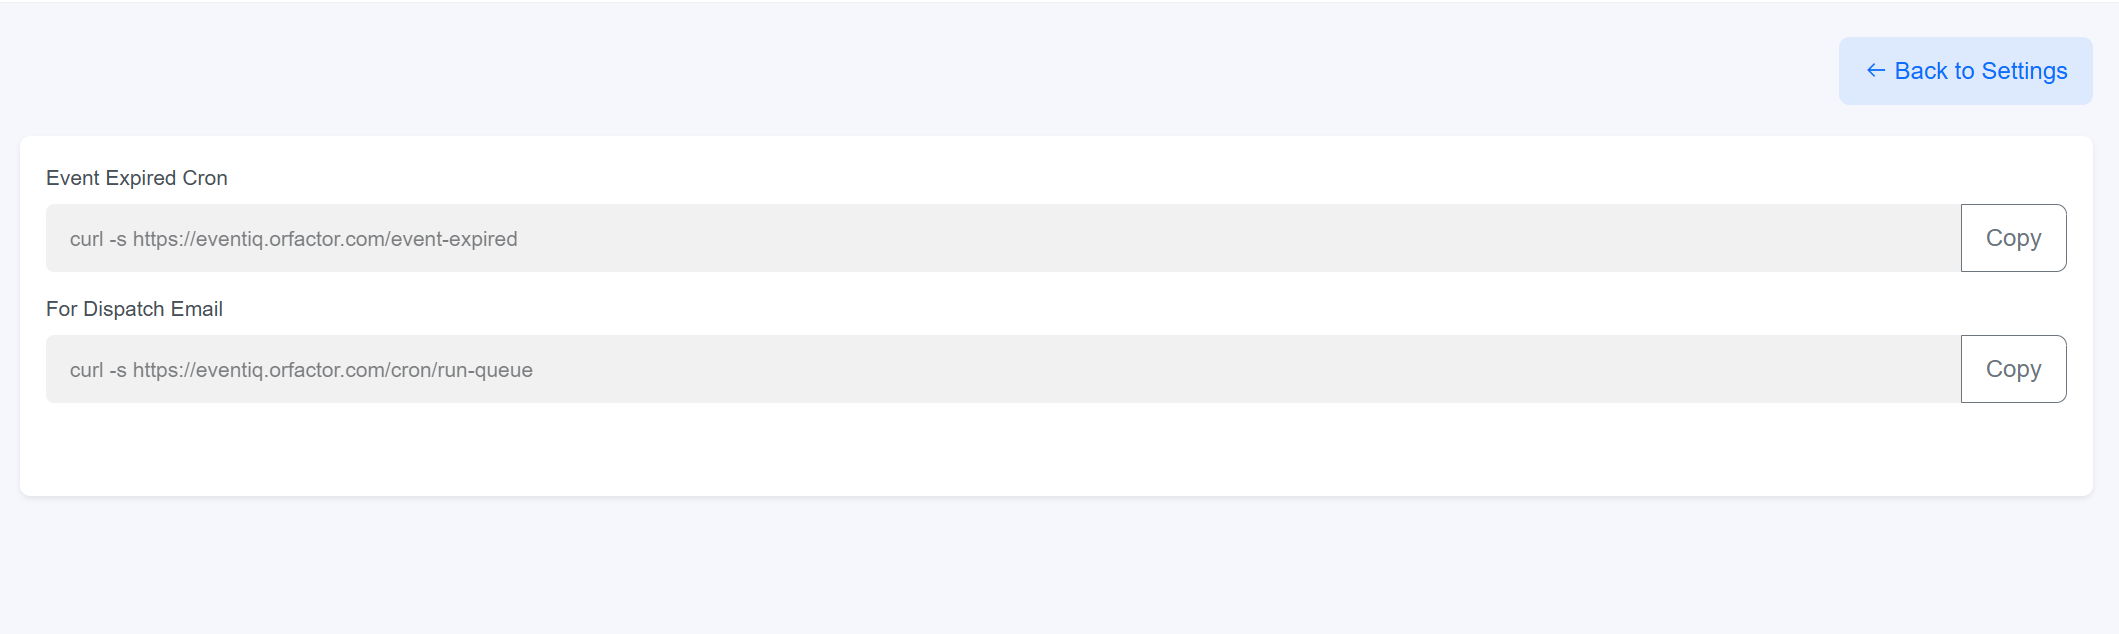
Automate background tasks such as ticket status updates, email queues, and database maintenance using system-generated command strings.
3. Extension Settings
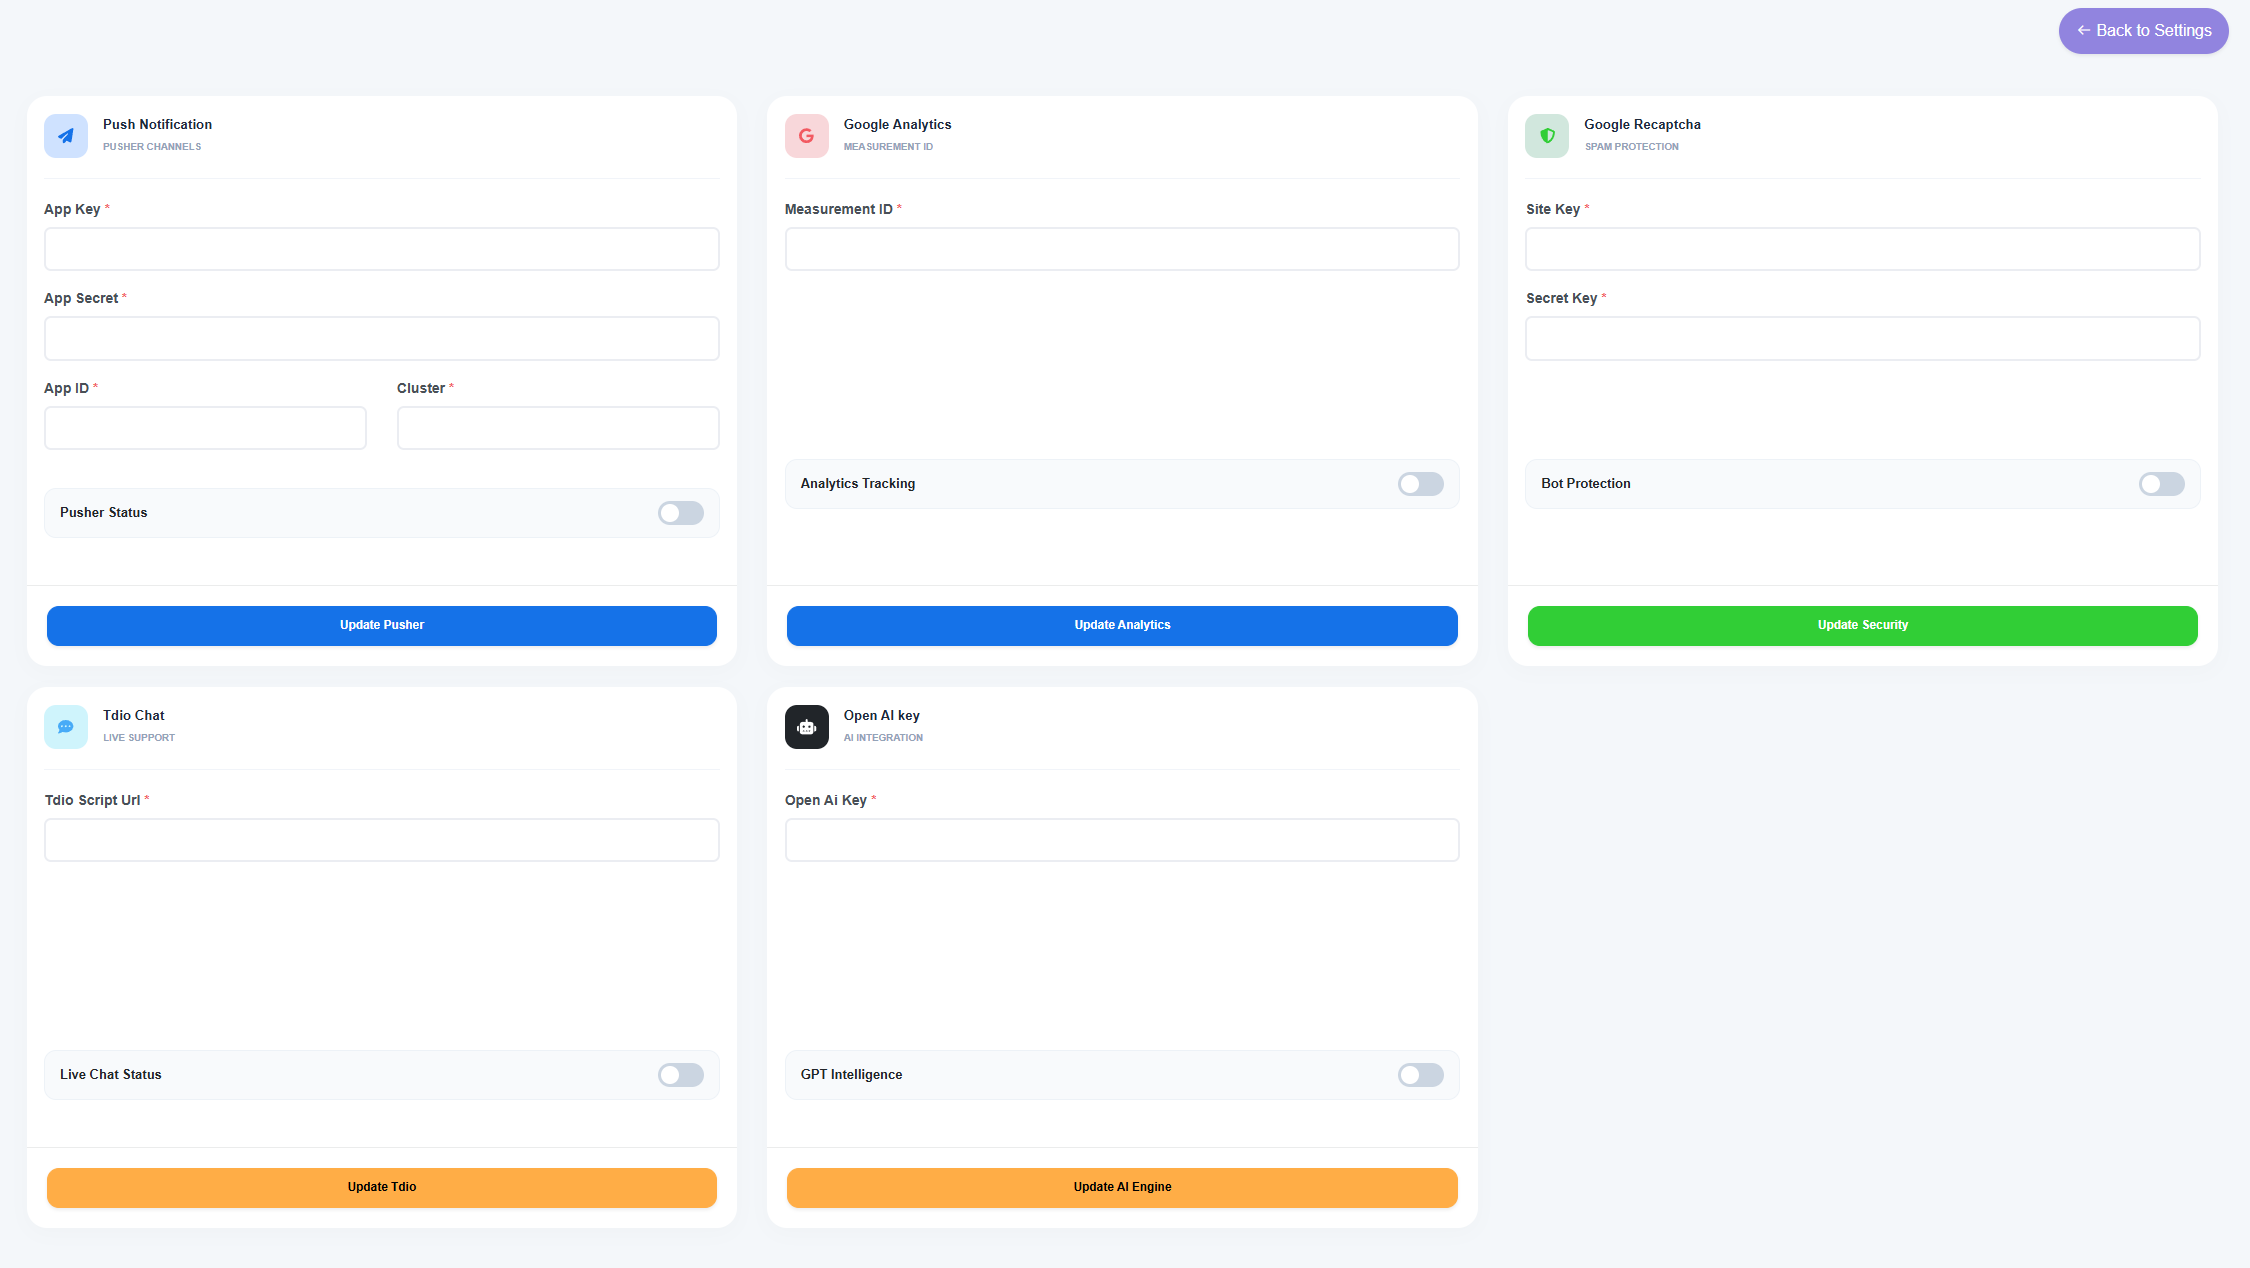
Manage third-party integrations to enhance platform functionality, including analytics, security, and real-time communication tools.
Integrated Service Modules
- Push Notifications: Powered by Pusher Channels, requiring App Key, App Secret, App ID, and Cluster info.
- Google Analytics: Integration for measurement tracking using a specific Measurement ID.
- Google Recaptcha: Spam protection requiring a Site Key and Secret Key for Bot Protection.
- Tdio Chat: Live support integration via a script URL to enable real-time chat status.
- OpenAI (AI Content Assistant): Add your OpenAI API key to enable AI content generation for Event Descriptions and Blog Content.
4. SEO Settings
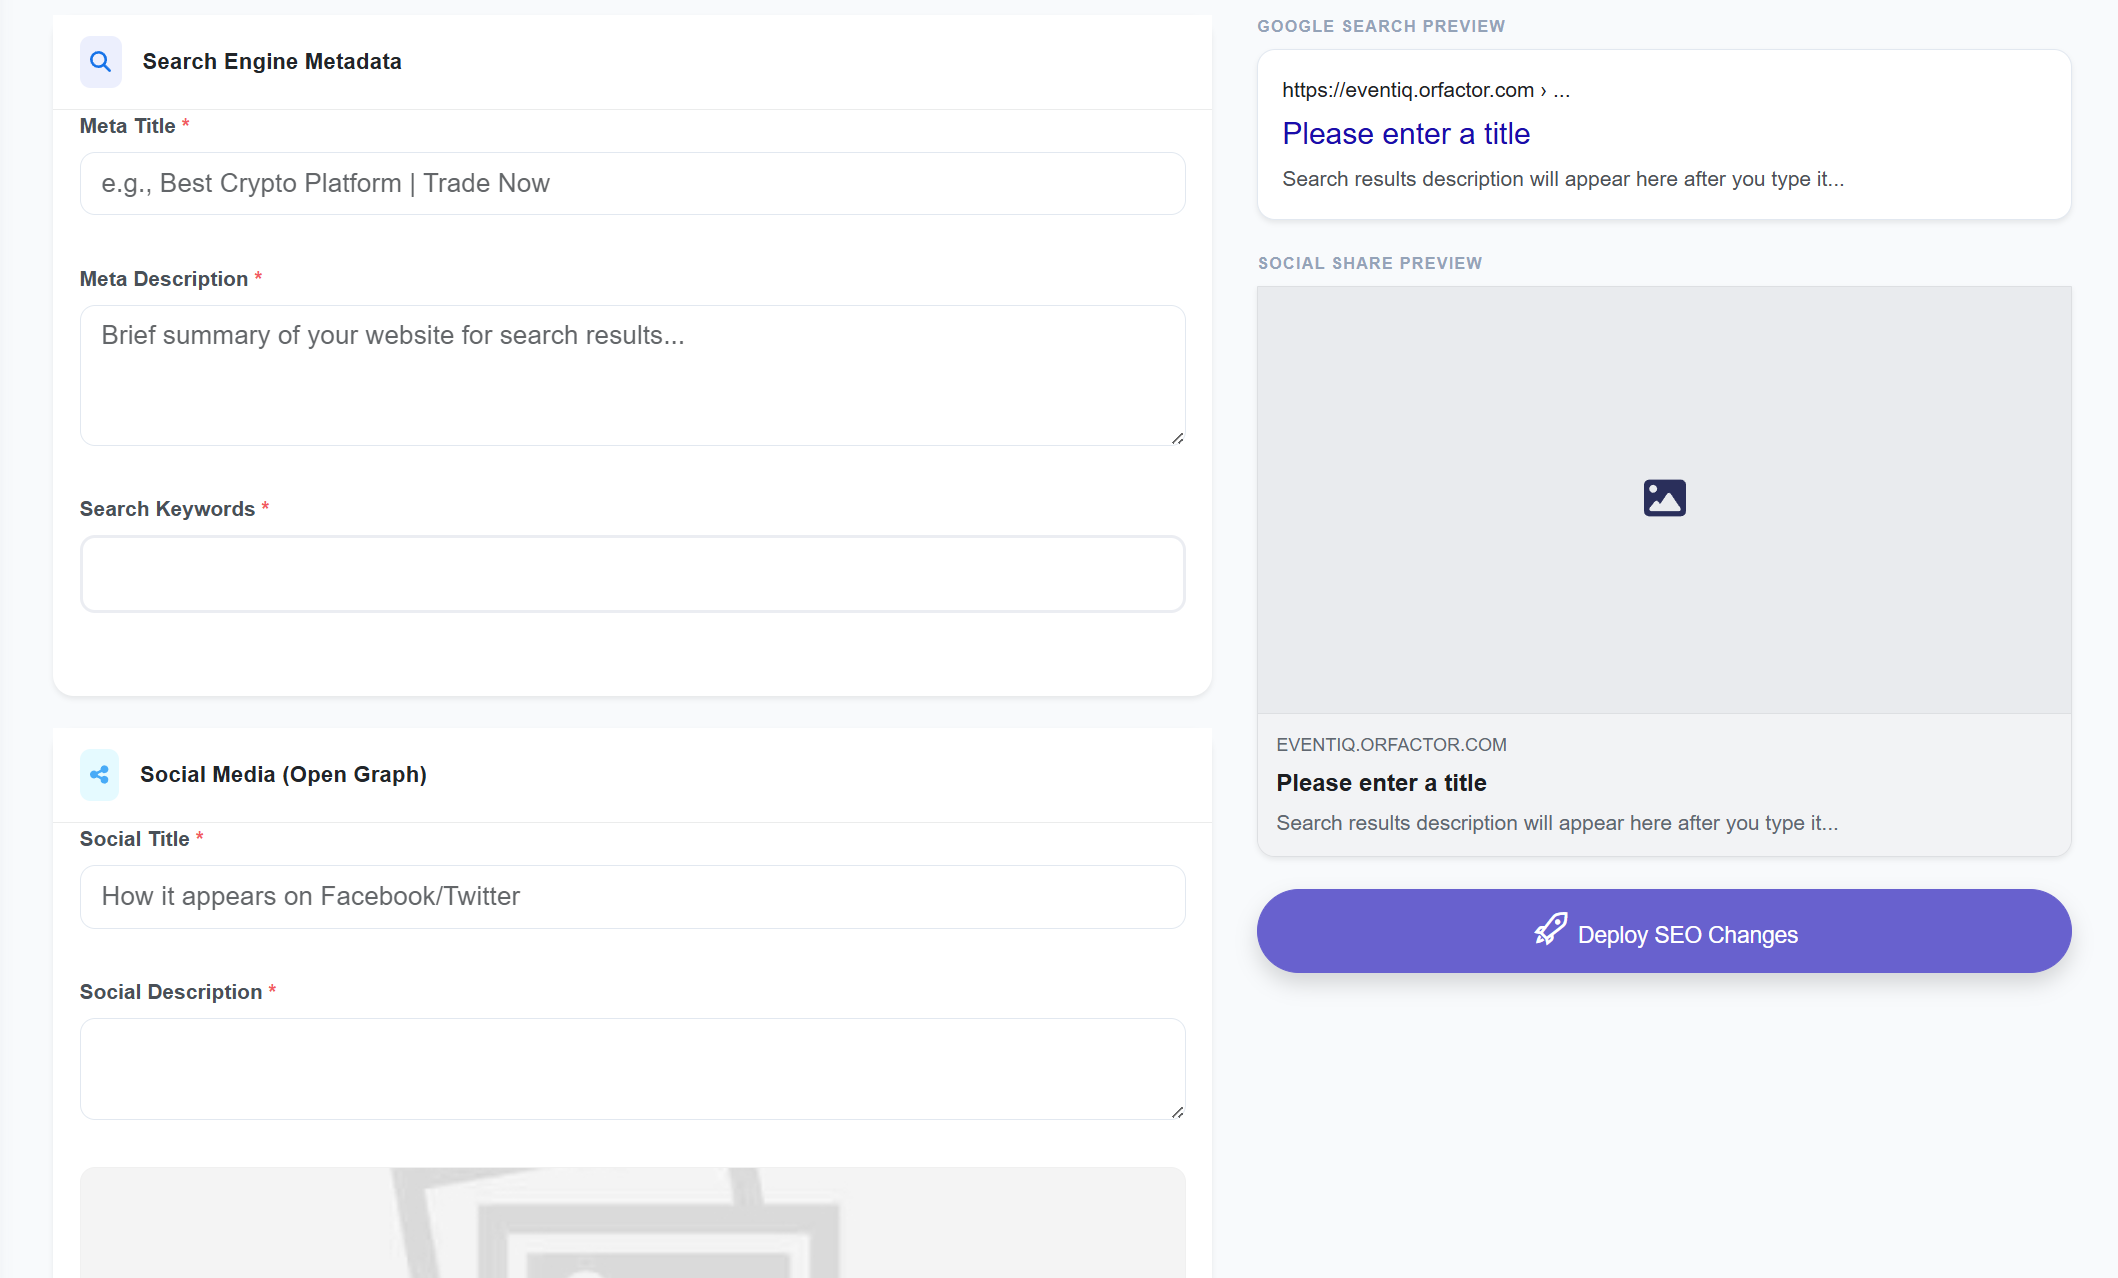
Configure meta titles, descriptions, keywords, and social sharing tags. This module is essential for ensuring the platform is correctly indexed by search engines and appears professionally when shared on social media.
Metadata & Preview Features
- Search Engine Metadata: Define the Meta Title, Meta Description, and Search Keywords that search engines use to rank and display your site.
- Social Media (Open Graph): Customize the Social Title and Social Description specifically for how links appear when shared on platforms like Facebook and Twitter.
- Google Search Preview: A real-time visualization tool that shows exactly how your title and description will look in live Google search results.
- Social Share Preview: Displays a mock-up of the social media post card, including the shared image and text alignment.
- Deployment: Includes a "Deploy SEO Changes" action to immediately push updated metadata to the platform's frontend headers.
6. Site Preference
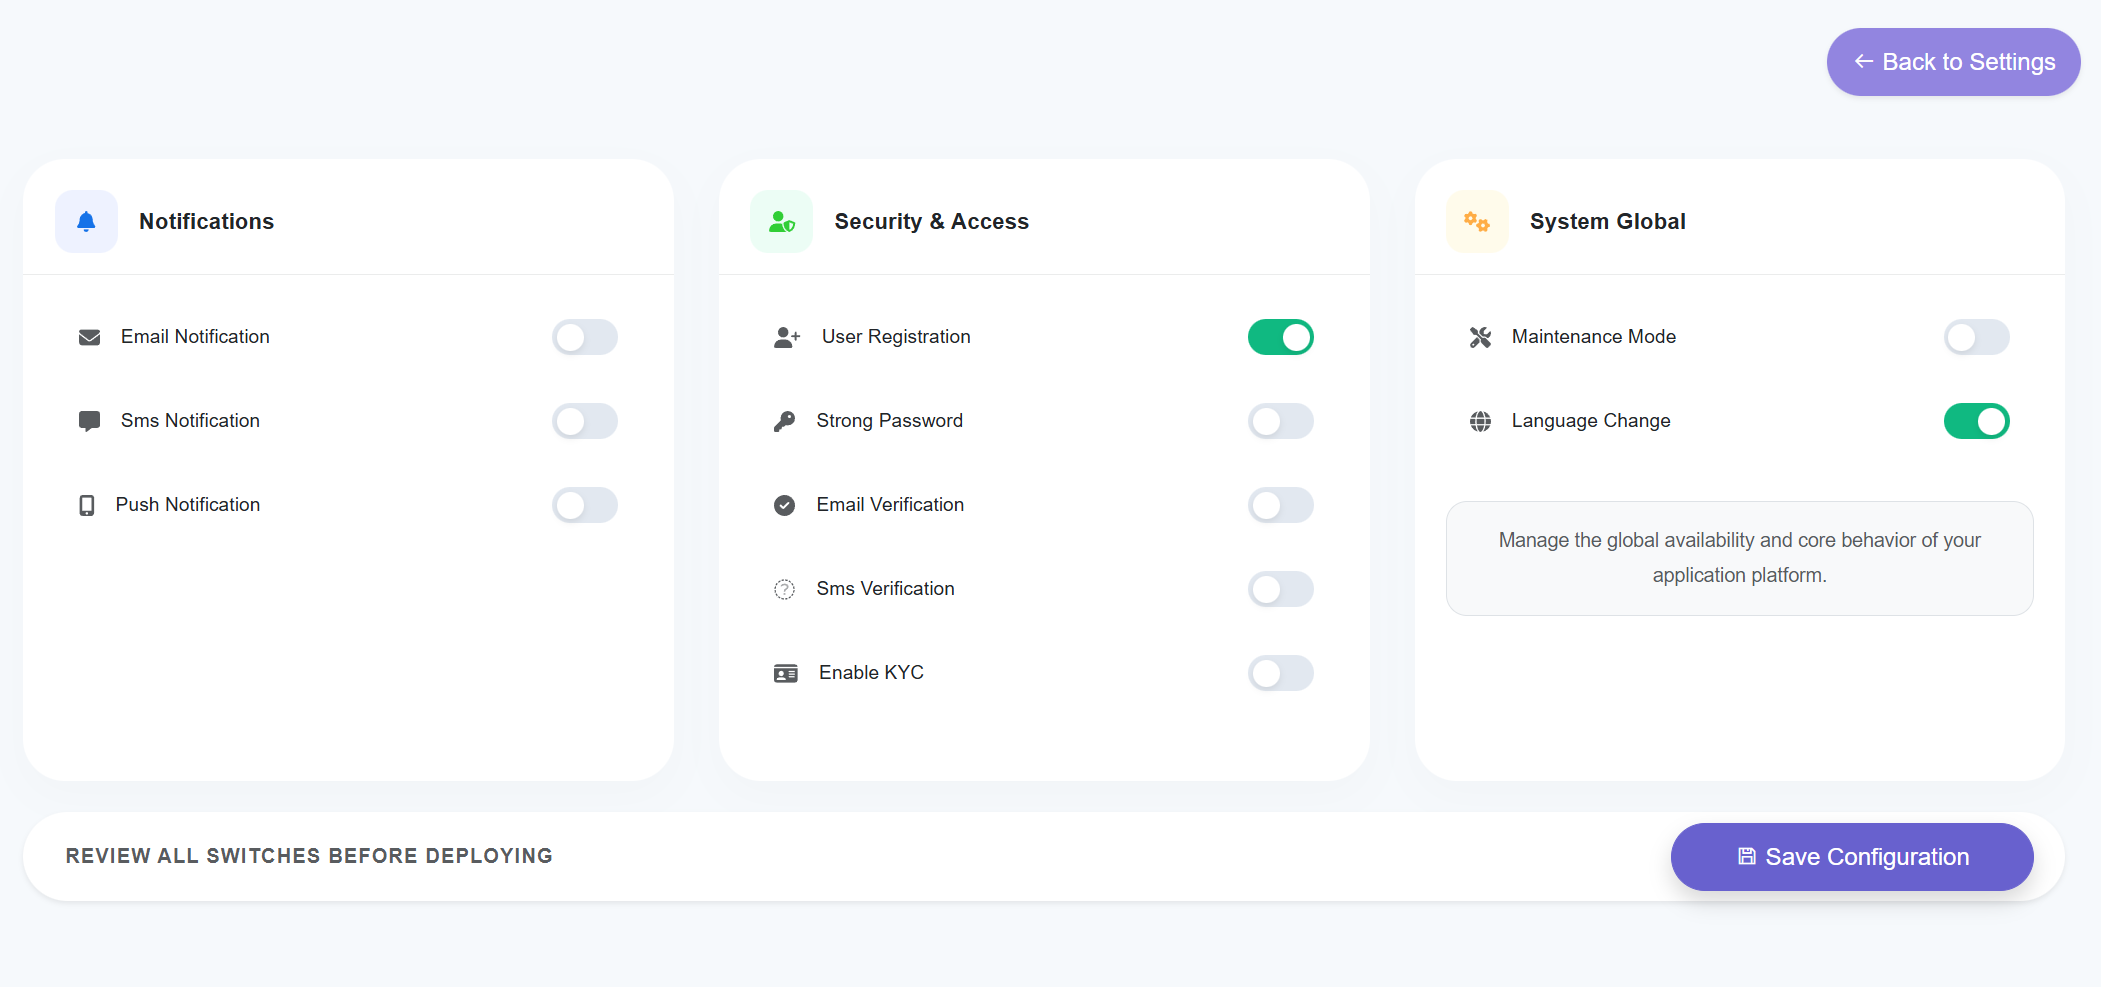
The Site Preference hub allows administrators to manage the global availability, security protocols, and communication channels of the application. This section uses a toggle-based system to deploy immediate changes across the platform's core behavior.
Preference Control Categories
- Enable/Disable Email alerts.
- Toggle SMS messaging services.
- Activate Push Notifications for mobile/browser.
- Toggle User Registration availability.
- Enforce Strong Password requirements.
- Enable Email/SMS Verification.
- Mandate KYC verification.
- Activate Maintenance Mode (disables frontend).
- Allow Language Change for end-users.
7. KYC Settings
Manage user verification requirements by defining custom data collection fields. This module allows administrators to build dynamic forms that users must complete to verify their identity, ensuring platform security and regulatory compliance.

Verification Field Constructor
- Dynamic Field Management: Use the + Add button to create new verification requirements such as ID numbers, document uploads, or address details.
- Field Attributes:
- Field Name: The internal system identifier (e.g.,
national_identification). - Field Label: The user-friendly text displayed on the frontend (e.g., "National Identification").
- Field Name: The internal system identifier (e.g.,
- Input Versatility: Select the Input Type (Text, File, etc.) to determine what kind of data the user should provide.
- Requirement Logic: Toggle the Required/Optional dropdown to make specific identity data mandatory for account verification.
- Modular Control: Individual fields can be removed using the Delete (trash icon) button before clicking Save KYC Settings to finalize the verification flow.
8. Email Configuration
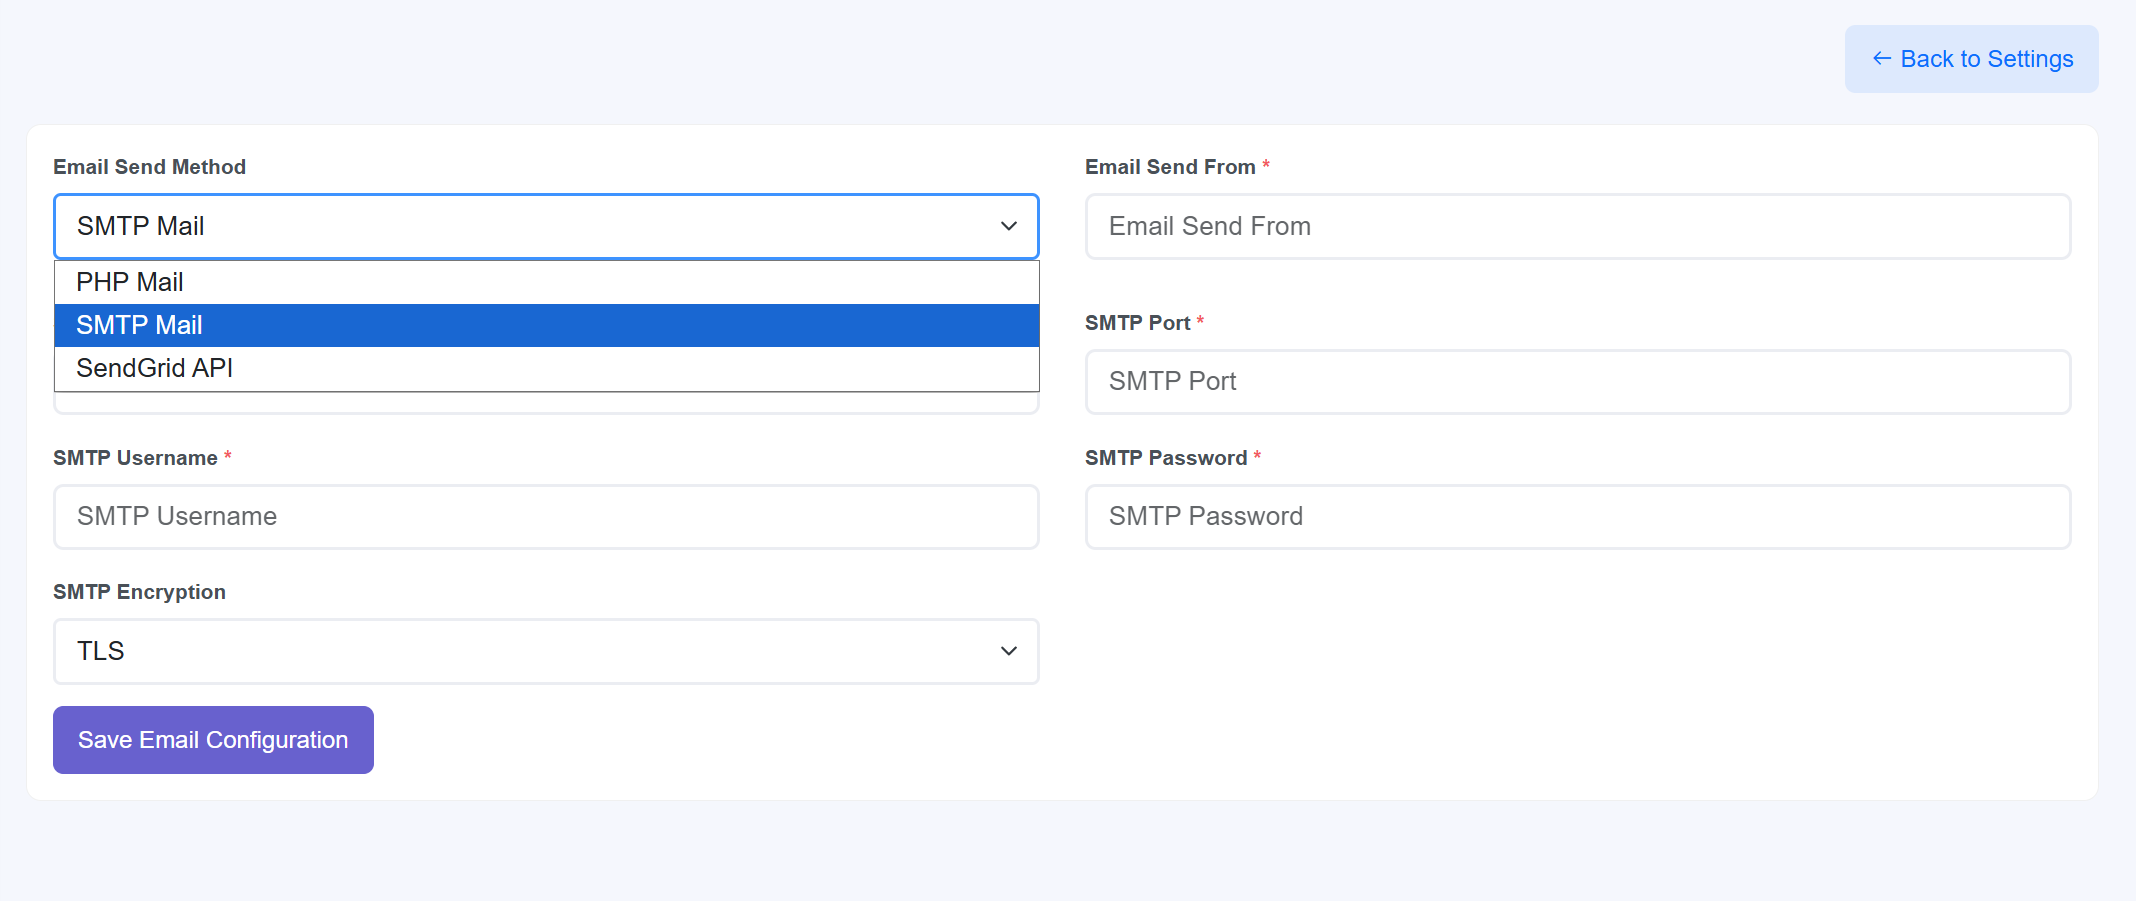
This module acts as the technical backbone for all platform-to-user communications. Administrators can configure the outbound mail server settings to ensure high deliverability for tickets, password resets, and event updates.
Technical Configuration Parameters
- Email Send Method: Select from multiple drivers including PHP Mail, SMTP Mail (recommended), or SendGrid API for professional-grade bulk mailing.
- Email Send From: Define the official system email address that will appear in the "From" field of all outgoing messages.
- SMTP Server Credentials: Includes dedicated fields for the SMTP Port, SMTP Username, and SMTP Password provided by your mail host.
- Encryption Protocols: Choose the security layer for mail transmission, with support for TLS (Transport Layer Security) as shown in the dropdown.
- Action: Use the Save Email Configuration button to apply and validate the connection to your mail server.
9. Email Templates
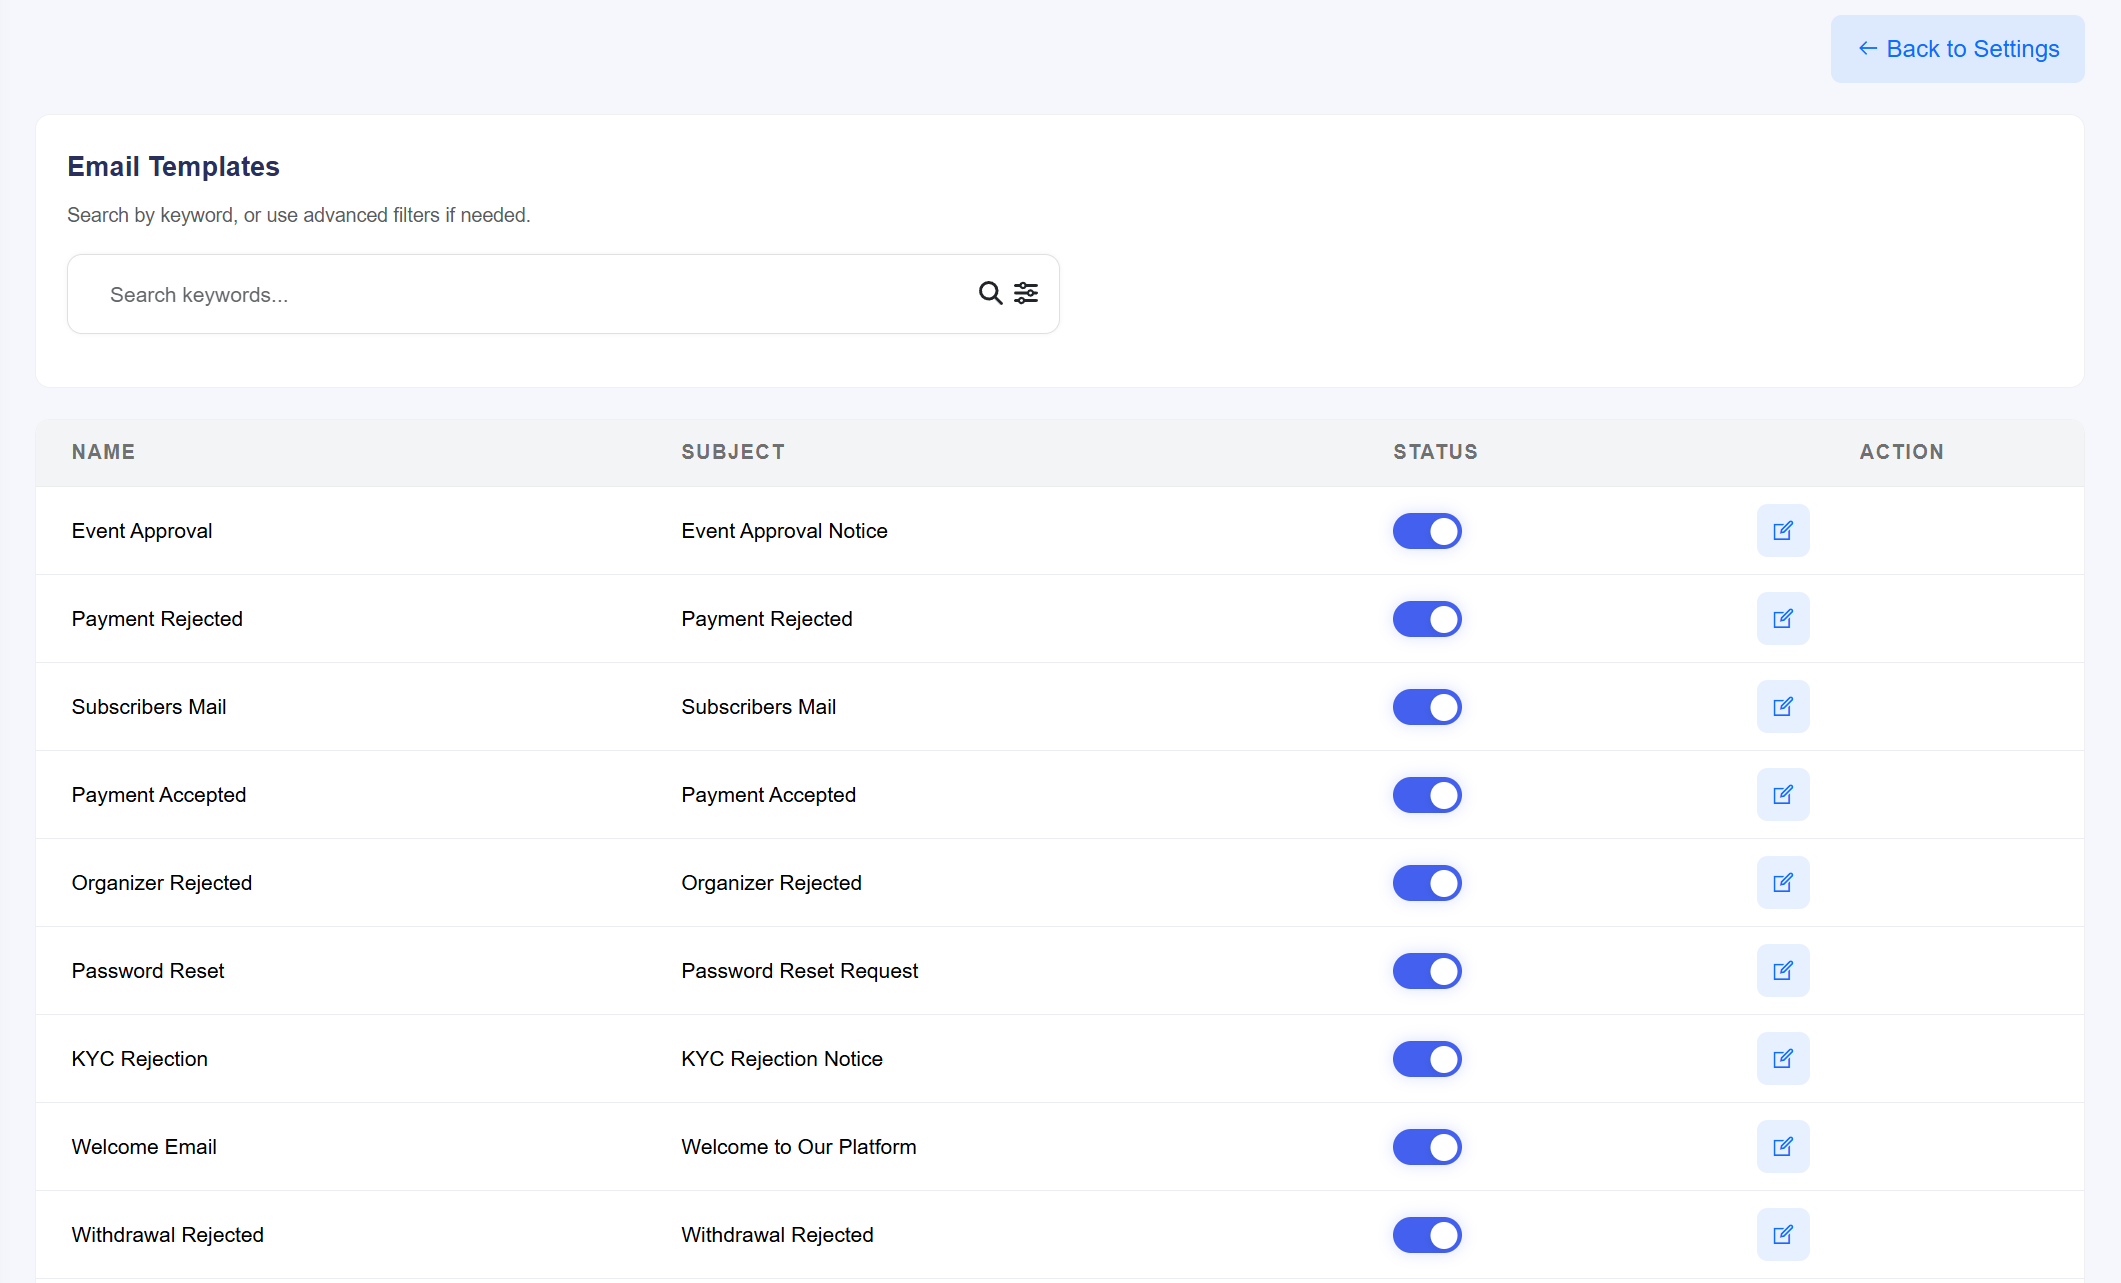
The Email Templates hub provides a centralized interface for managing all automated correspondence. Administrators can enable or disable specific triggers and customize the messaging for every touchpoint in the user and organizer journey.
Template Management Features
- Search & Filter: Use the global keyword search and advanced filters to quickly locate specific templates by name or subject line.
- Transactional Triggers: Manage critical notifications including Event Approval, Payment Accepted/Rejected, and Password Reset.
- User Lifecycle Mails: Customize onboarding and verification messages such as the Welcome Email and KYC Rejection notices.
- Financial Notifications: Control alerts related to organizer payouts, such as Withdrawal Rejected updates.
- Status Control: Each template features a dedicated Enable/Disable toggle, allowing for instant activation or deactivation of specific automated emails.
- Content Editing: Access the Edit (blue icon) action to modify the HTML content, subject line, and dynamic shortcodes for each individual template.
10. Currencies
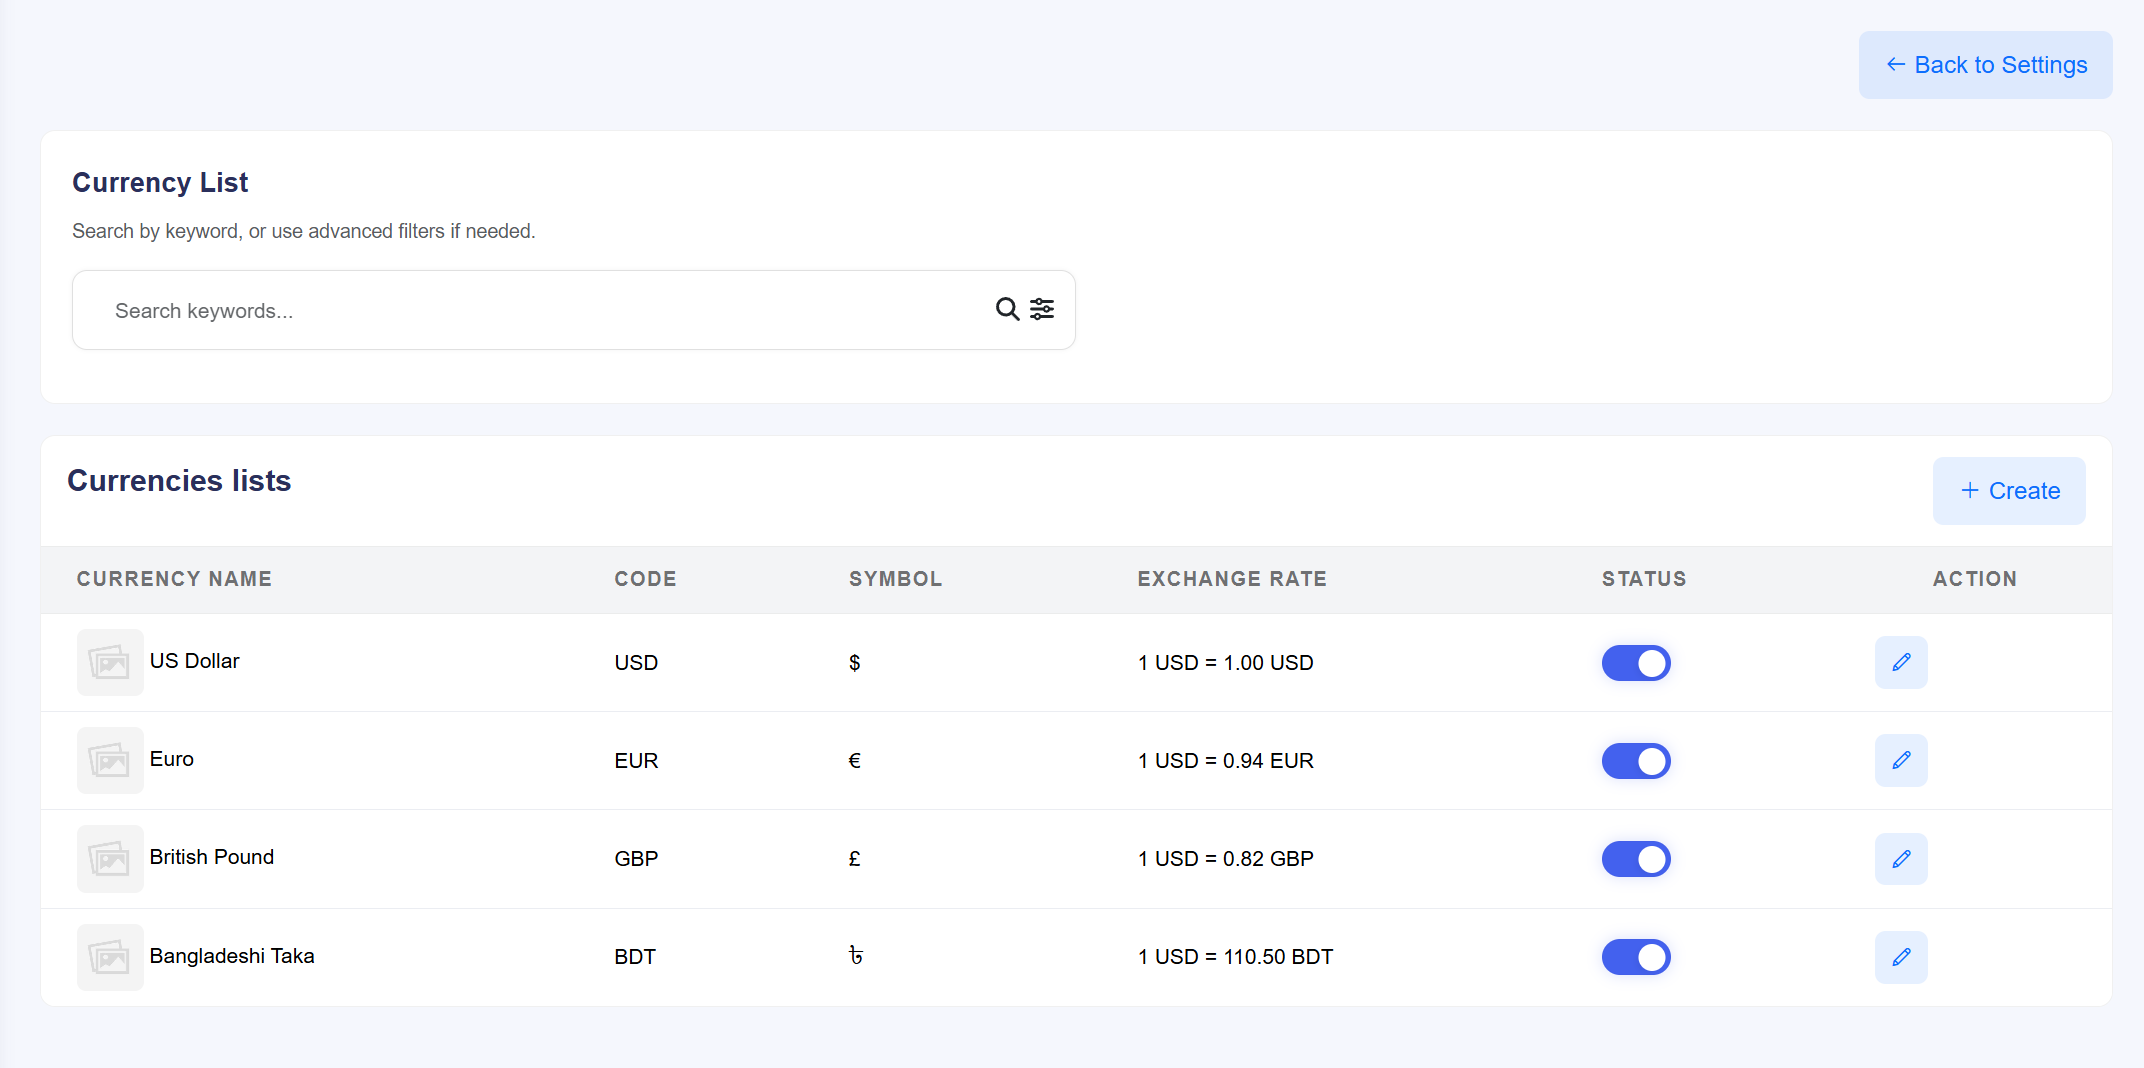
The Currencies module enables multi-currency support for your global event marketplace. It allows administrators to define which currencies are accepted, manage real-time or manual exchange rates, and toggle the availability of specific tender types across the platform.
Currency Asset Management
- Exchange Rate Control: Define the value of international currencies relative to your base currency (e.g., 1 USD = 0.94 EUR or 1 USD = 110.50 BDT).
- Currency Identity: Manage essential data points for each entry, including the Currency Name (e.g., British Pound), the 3-letter ISO Code (GBP), and the unique Symbol (£).
- Operational Status: Use the Status toggle to instantly enable or disable a currency from being used during the checkout process without deleting the record.
- Dynamic List Growth: Utilize the + Create button to add new currencies as your marketplace expands into new regions.
- Search and Filter: Easily navigate large currency lists using the keyword search bar and advanced filtering options to find specific regional settings.
- Actionable Edits: The Edit (blue pen icon) allows for the modification of exchange rates and symbol formatting at any time to reflect global market shifts.
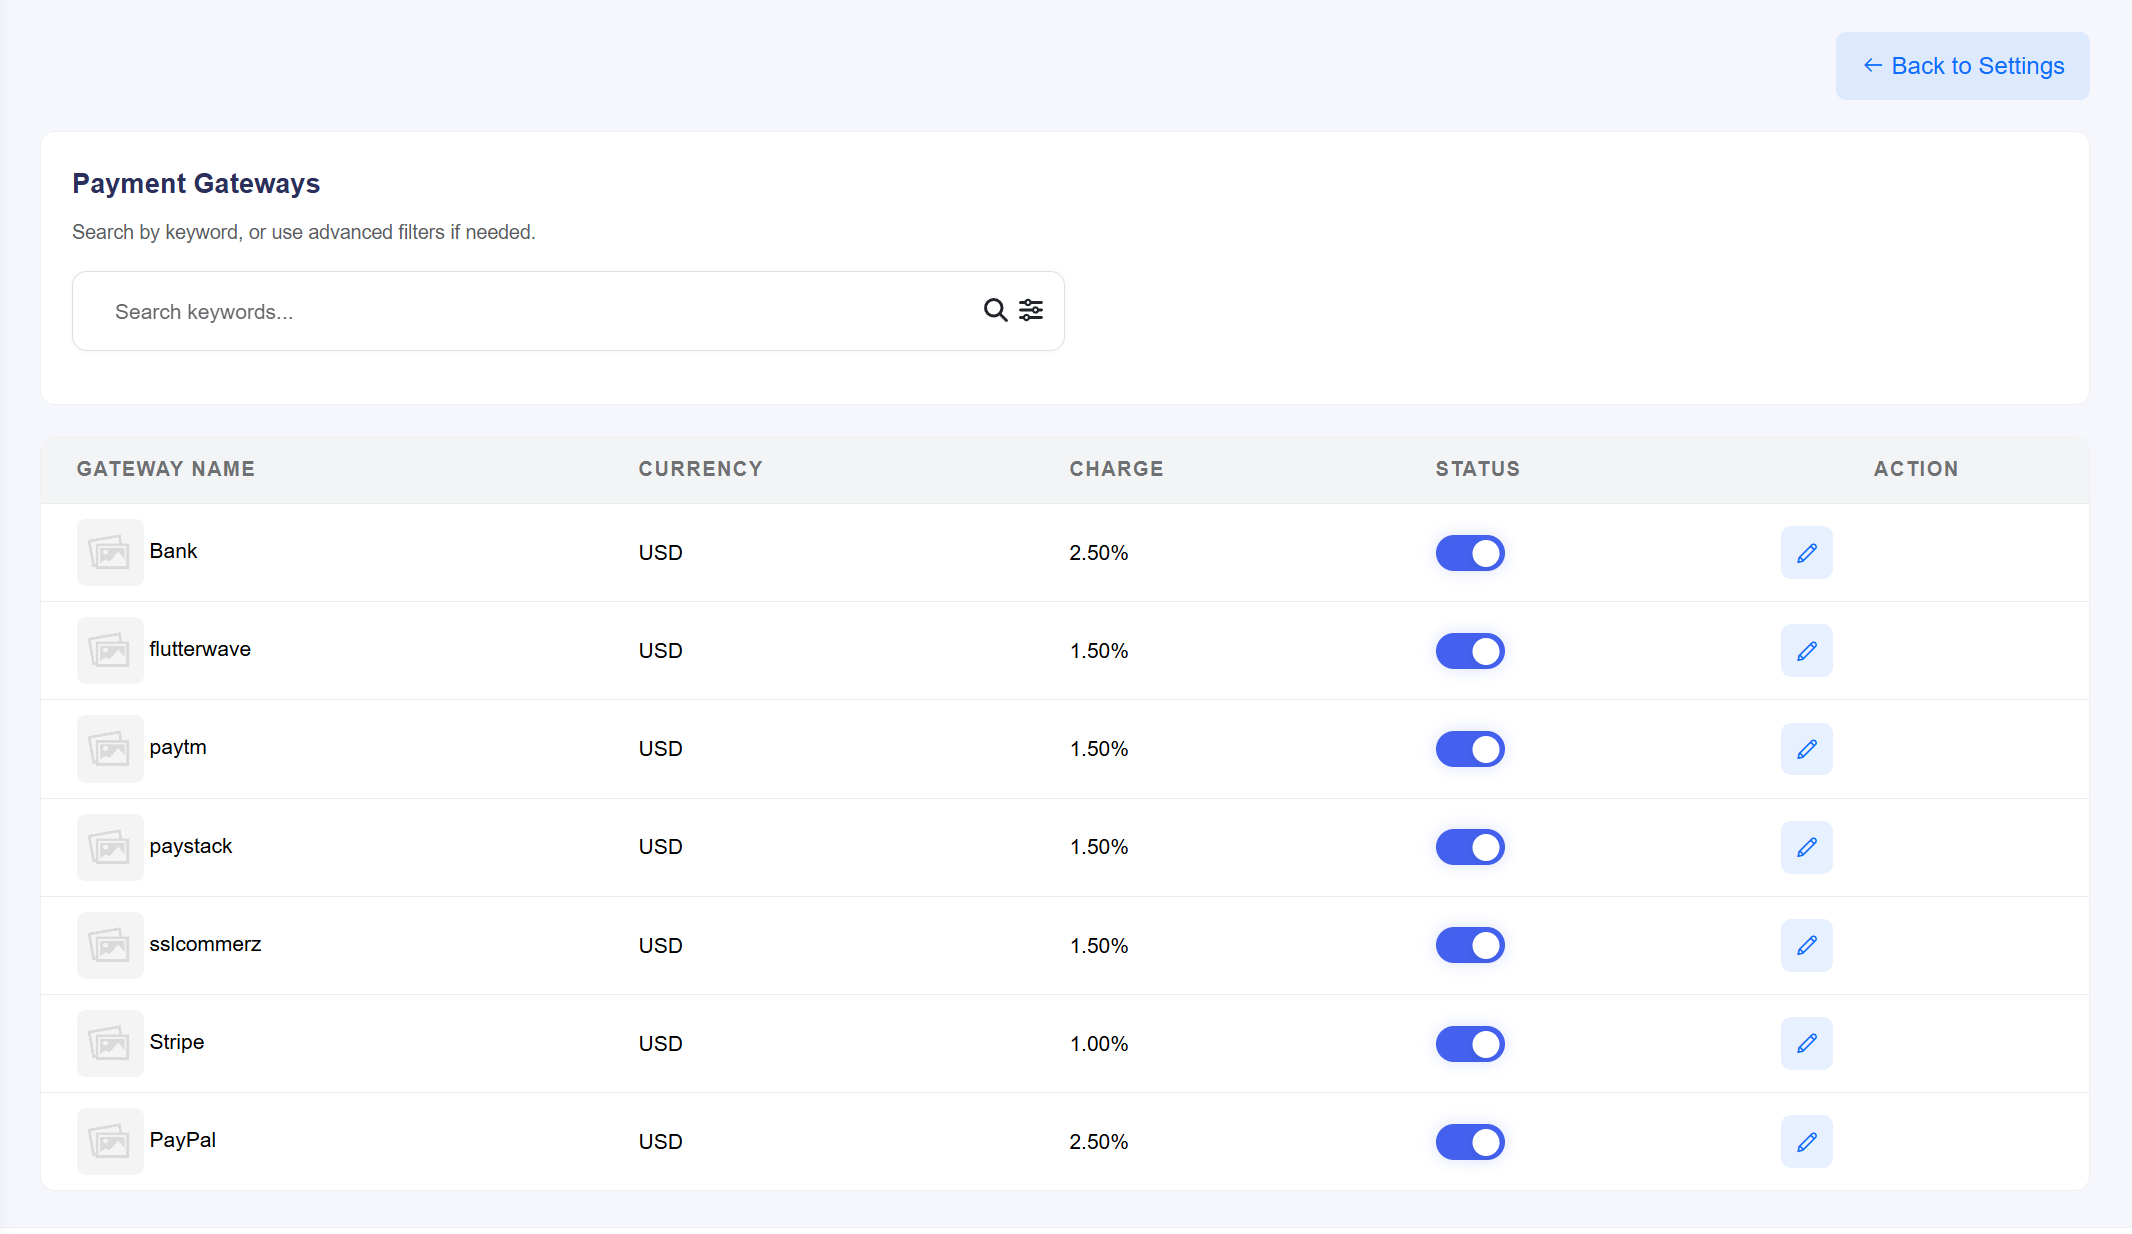
11. Gateways
The Gateways module serves as the financial intake hub for the platform. Administrators can manage a variety of manual and automatic payment processors, configure transaction fees for each method, and toggle specific providers to streamline the checkout experience for global users.
Payment Provider Management
- Diverse Provider Support: Manage integrations for popular global and regional processors, including Stripe, PayPal, Paystack, Flutterwave, Paytm, and SSLCommerz.
- Manual Payment Methods: Includes support for traditional Bank transfers for users who prefer offline payment options.
- Transaction Charge Logic: Define specific percentage-based Charges for each gateway to cover processing costs (e.g., 2.50% for PayPal/Bank and 1.00% for Stripe).
- Currency Association: View and manage which Currency is processed by each gateway (currently set to USD across all providers).
- Operational Availability: Use individual Status toggles to enable or disable specific payment methods instantly.
- Configuration Actions: Access the Edit (blue pen icon) to enter API credentials, merchant keys, or bank account details for each respective gateway.
- System Navigation: A global Search bar and advanced filters are available to quickly locate and manage specific payment methods.
12. Referral Settings
The Referral Settings module is the core growth engine of the platform. It allows administrators to incentivize user acquisition and engagement by defining multi-level commission structures for registrations, ticket purchases, and financial withdrawals.

Commission Tier Analysis
- Registration Commissions: Define rewards for bringing new users to the platform.
- Withdraw Commissions: Incentivize organizer activity by offering rewards based on payout volumes.
- Purchase Commissions: Drive ticket sales by rewarding affiliates for successful transactions.
- Dynamic Level Management: Use the blue (+) buttons to add new depth to your referral tree, allowing for complex, multi-generational affiliate marketing strategies.
- Granular Control: Each individual commission level features its own Status toggle, enabling you to pause specific rewards without deleting the tier configuration.
- Actionable UI: Easily remove underperforming tiers using the red trash icon and finalize all changes by clicking Save Referral Settings.
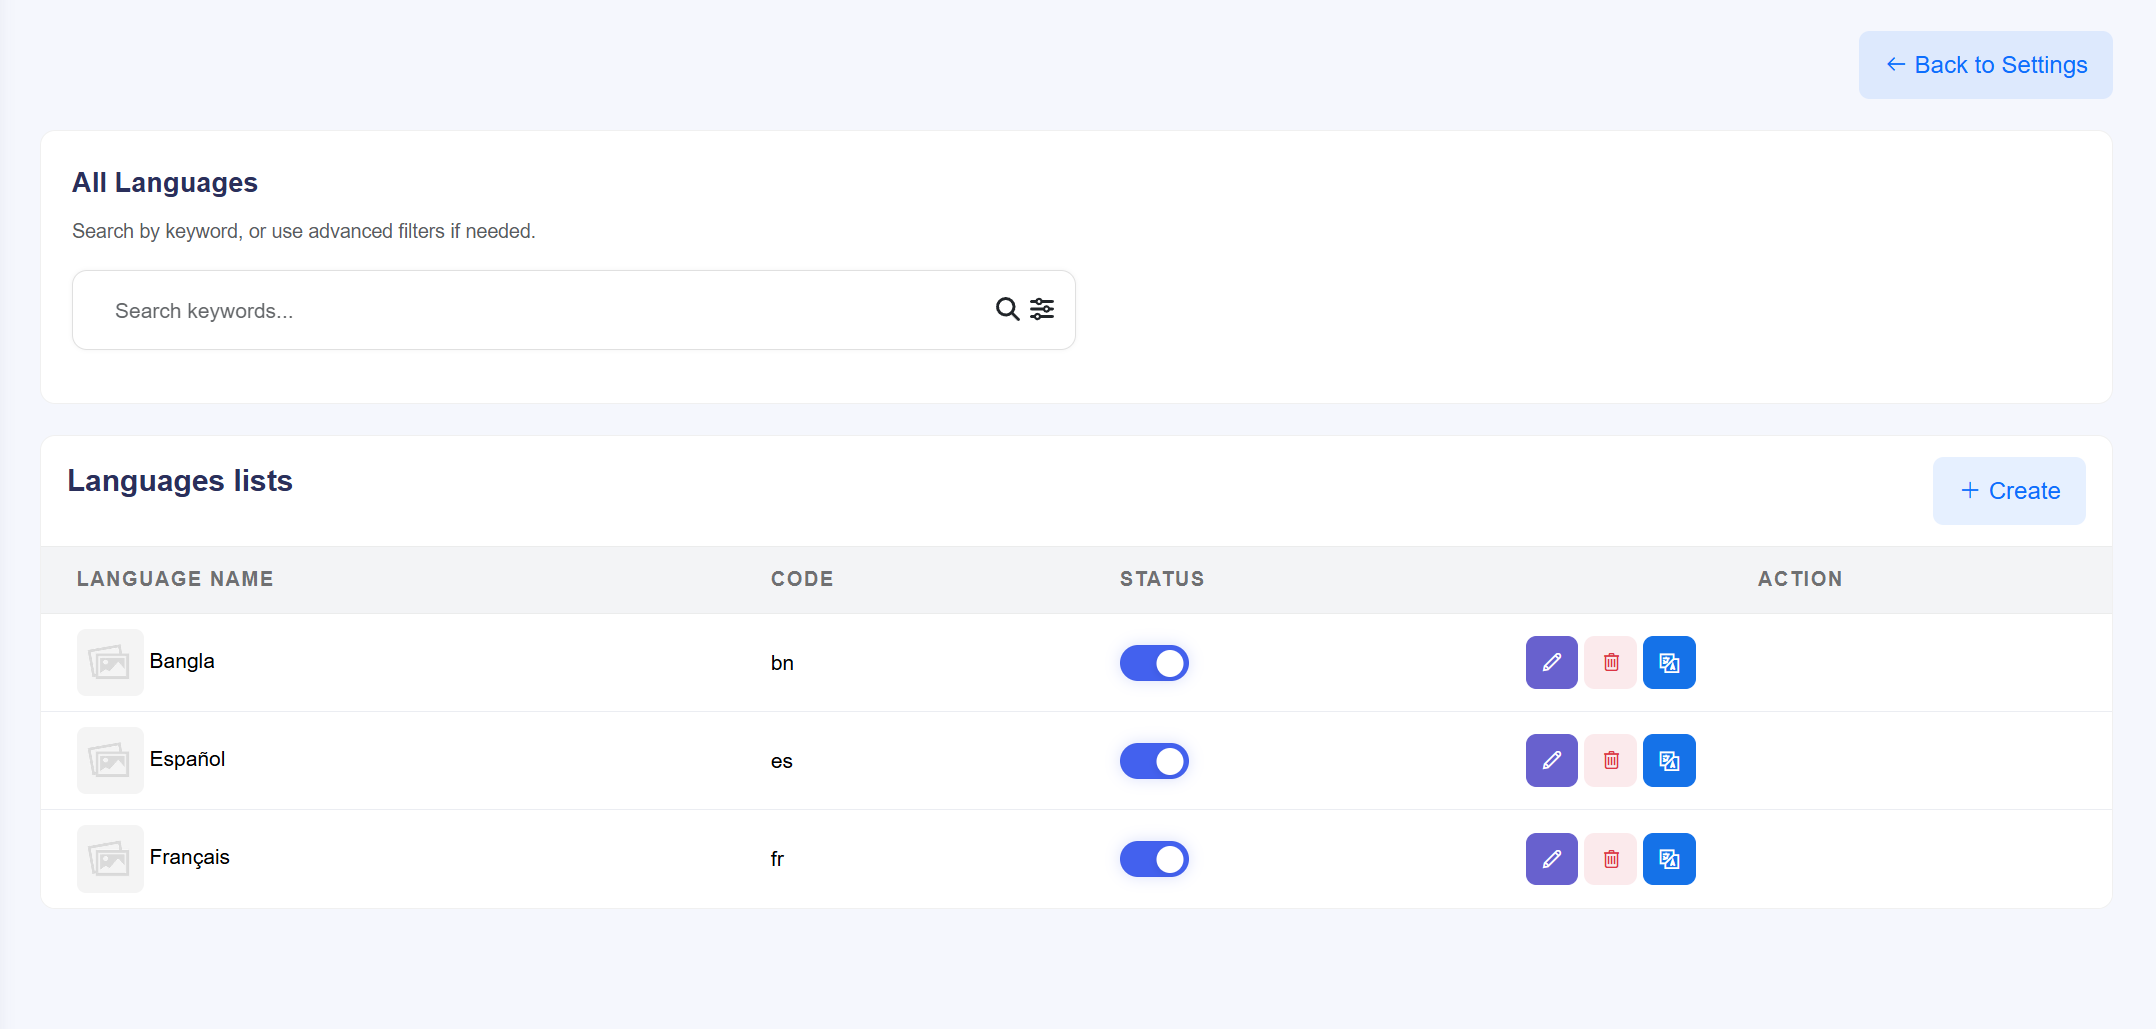
13. Language Settings
The Language Settings module empowers administrators to localize the platform for a global audience. It provides a centralized interface to manage supported languages, edit system-wide translations, and toggle specific languages on or off to match your target market's needs.
Localization Management Features
- Language Repository: View a structured list of all integrated languages, including the Language Name (e.g., Bangla, Español, Français) and its corresponding ISO Code (e.g., bn, es, fr).
- Dynamic Expansion: Use the + Create button to add new language support as the platform scales into new geographical regions.
- Operational Status: Instantly enable or disable any language across the frontend using the dedicated Status toggle.
- Translation Management: Access the Translation (blue globe icon) action to customize and edit system-wide text strings for that specific language.
- Entry Maintenance: Utilize the Edit (purple pen icon) to modify basic language details or the Delete (red trash icon) to remove a language profile entirely.
- Efficient Navigation: Quickly locate specific language entries using the keyword Search bar and advanced filtering options.
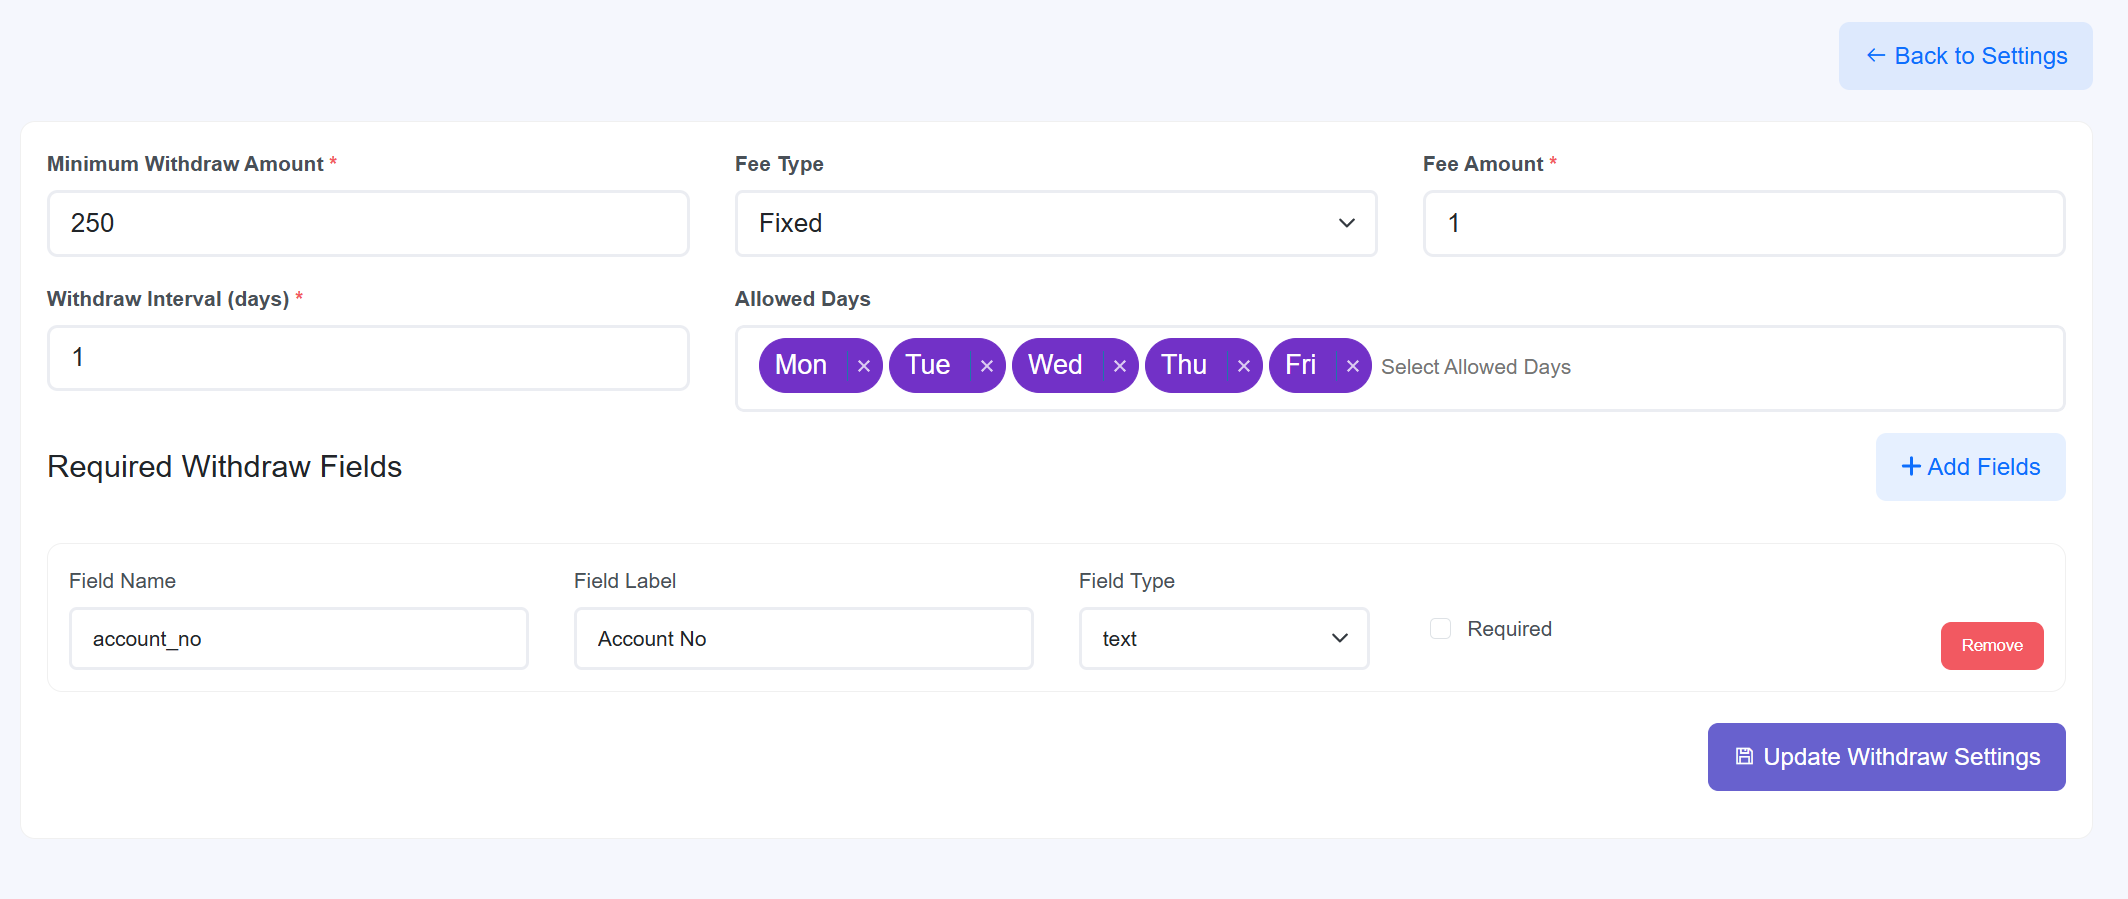
14. Withdraw Settings
The Withdraw Settings module establishes the financial framework for how organizers and affiliates receive their earnings. Administrators can define minimum payout thresholds, apply fixed or percentage-based fees, and set operational schedules for withdrawal requests.
Payout Operational Parameters
- Financial Limits: Set the Minimum Withdraw Amount to prevent micro-transactions and reduce administrative overhead.
- Fee Structure: Configure the Fee Type (Fixed or Percentage) and the specific Fee Amount applied to every withdrawal request.
- Scheduling: Define the Withdraw Interval in days and specify Allowed Days when users can initiate payout requests.
- Required Withdraw Fields: Dynamically build the information requirements for payouts. Administrators can use the + Add Fields button to request data like Account No, specifying the Field Type (Text, etc.) and marking them as Required or optional.
- Maintenance: Individual fields can be removed instantly using the Remove button. All global payout logic is finalized by clicking Update Withdraw Settings.
15. Section Settings & Management
The Section Settings hub is a dual-purpose interface designed for high-level site structure management and granular content editing. Administrators use this module to control the visual narrative of the landing page by toggling functional blocks and updating their specific marketing elements.
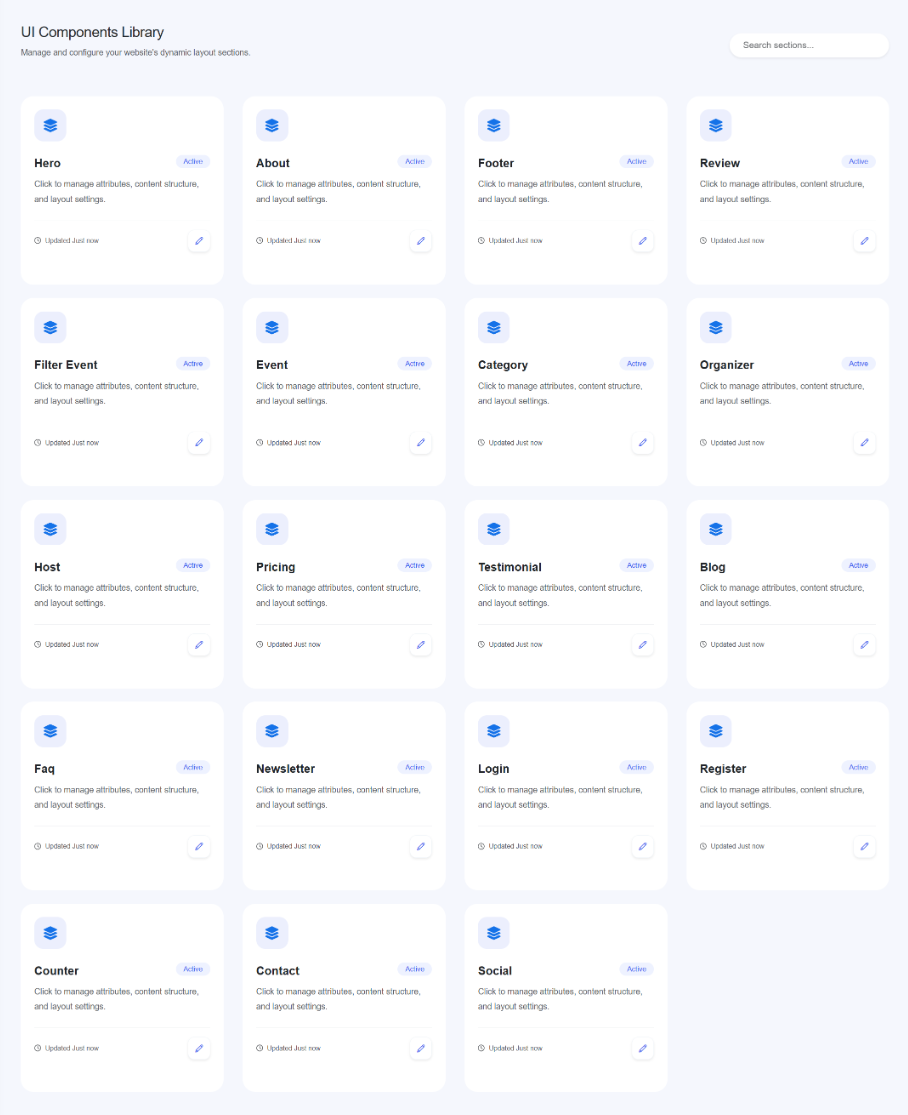
15.1 Component Library Overview
The library provides a grid view of every modular section available on the platform. Each card represents a distinct part of the user experience:
- Core Layouts: Manage the Hero, About, Footer, and Contact sections.
- Dynamic Listings: Control how Events, Categories, Organizers, and Hosts appear to users.
- Conversion Tools: Update settings for Pricing, Testimonials, Reviews, and Newsletters.
- Status Monitoring: Every card displays an Active badge if the section is live and tracks the last update time (e.g., "Updated Just now").
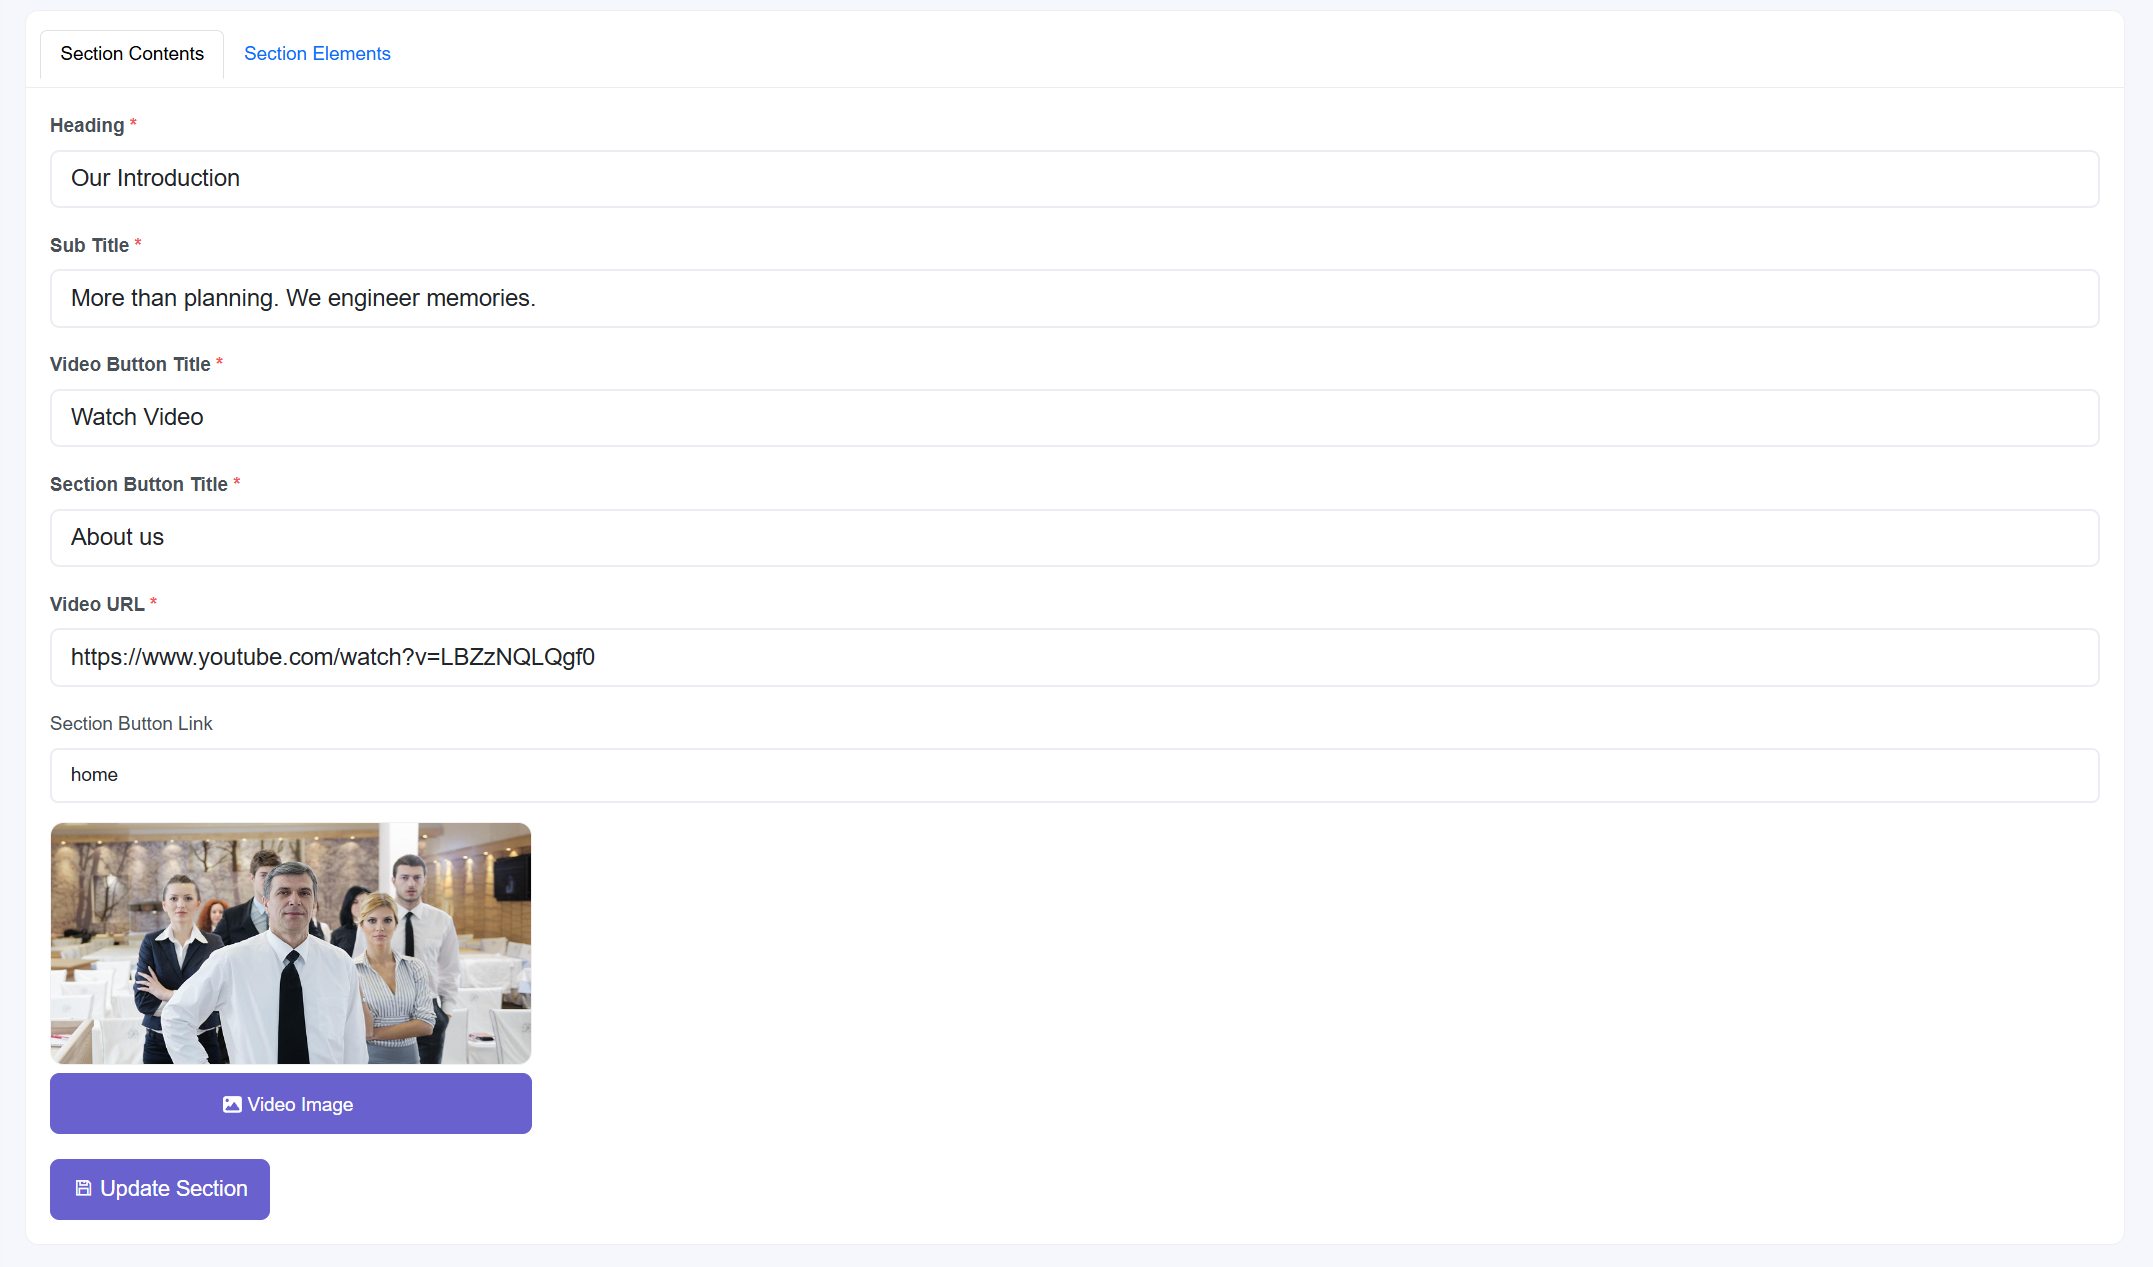
15.2 How to Manage & Update Sections
Clicking the Edit (blue pen icon) on any library card opens the management interface. From here, administrators can configure two primary areas:
- Section Contents: Edit primary text fields including the Heading (e.g., "Our Introduction"), Sub Title, and Button Titles for videos or internal links.
- Multimedia Integration:
- Input a Video URL (e.g., YouTube links) to embed playable marketing content.
- Upload a custom Video Image to serve as a high-quality visual placeholder or thumbnail.
- Navigation Logic: Define the Section Button Link (e.g., "home") to control where users are redirected after clicking a Call-to-Action (CTA).
- Section Elements: Switch to the Section Elements tab to manage repeating items like feature lists or individual team members within that module.
16. Pages Module
The Pages Module is a high-level management hub for the platform's URL structure and content layouts. It allows administrators to create new landing pages, manage SEO metadata for each route, and utilize a drag-and-drop builder to assemble site sections.
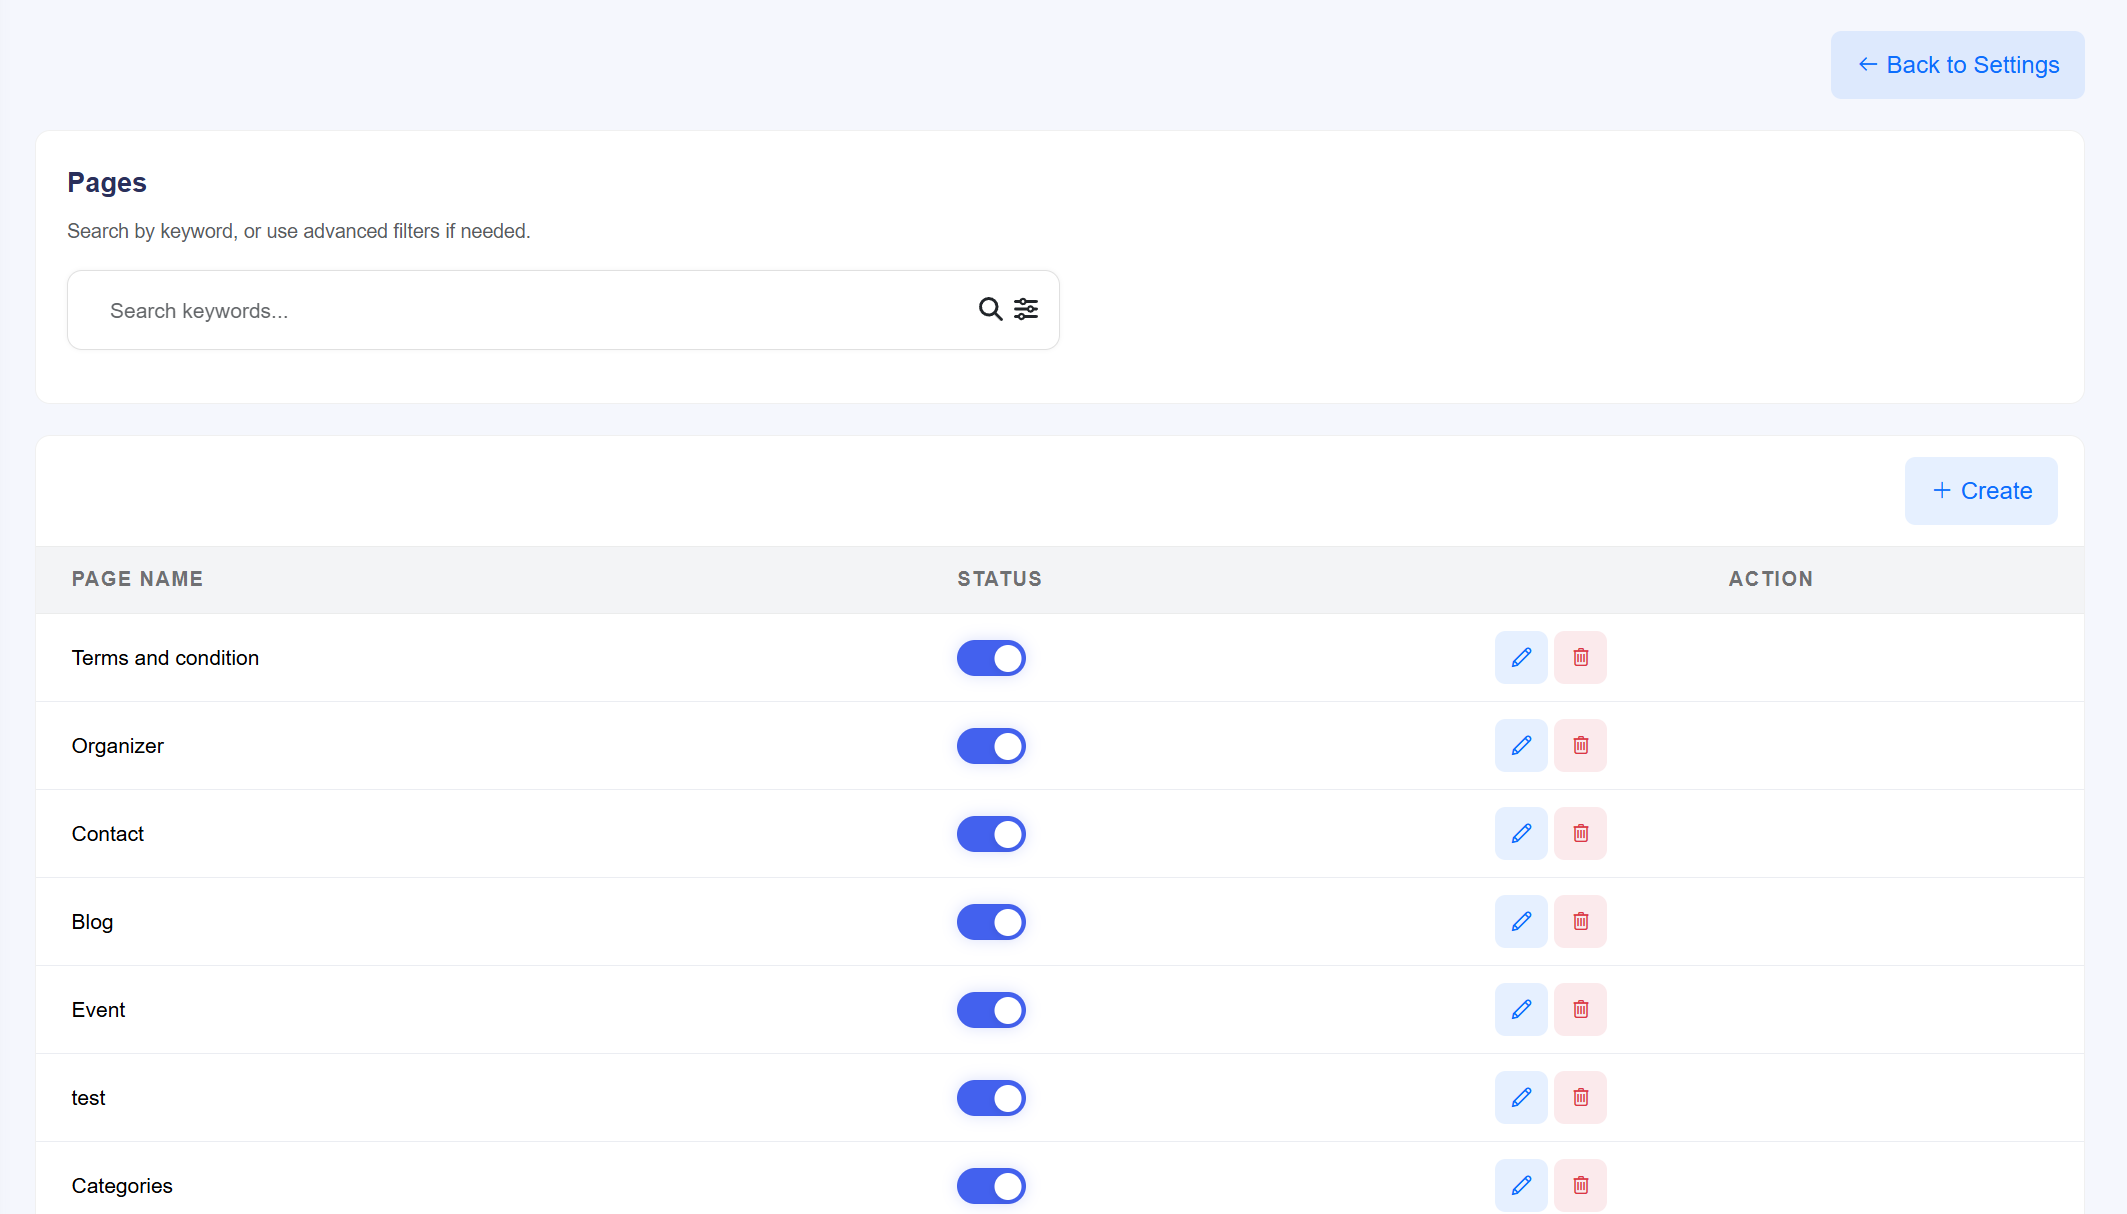
16.1 Page List Management
- Dynamic Search: Use the search bar to locate specific pages by name or use advanced filters to sort by status.
- Page Repository: Displays essential pages such as Terms and Conditions, Organizer, Contact, and Blog.
- Operational Actions:
- Status Toggle: Instantly enable or disable a page from being accessible on the frontend.
- Edit (Blue Pen): Access the page configuration and content builder.
- Delete (Red Trash): Permanently remove custom-created pages.
- Creation: Click the + Create button to initiate the setup for a new site route.
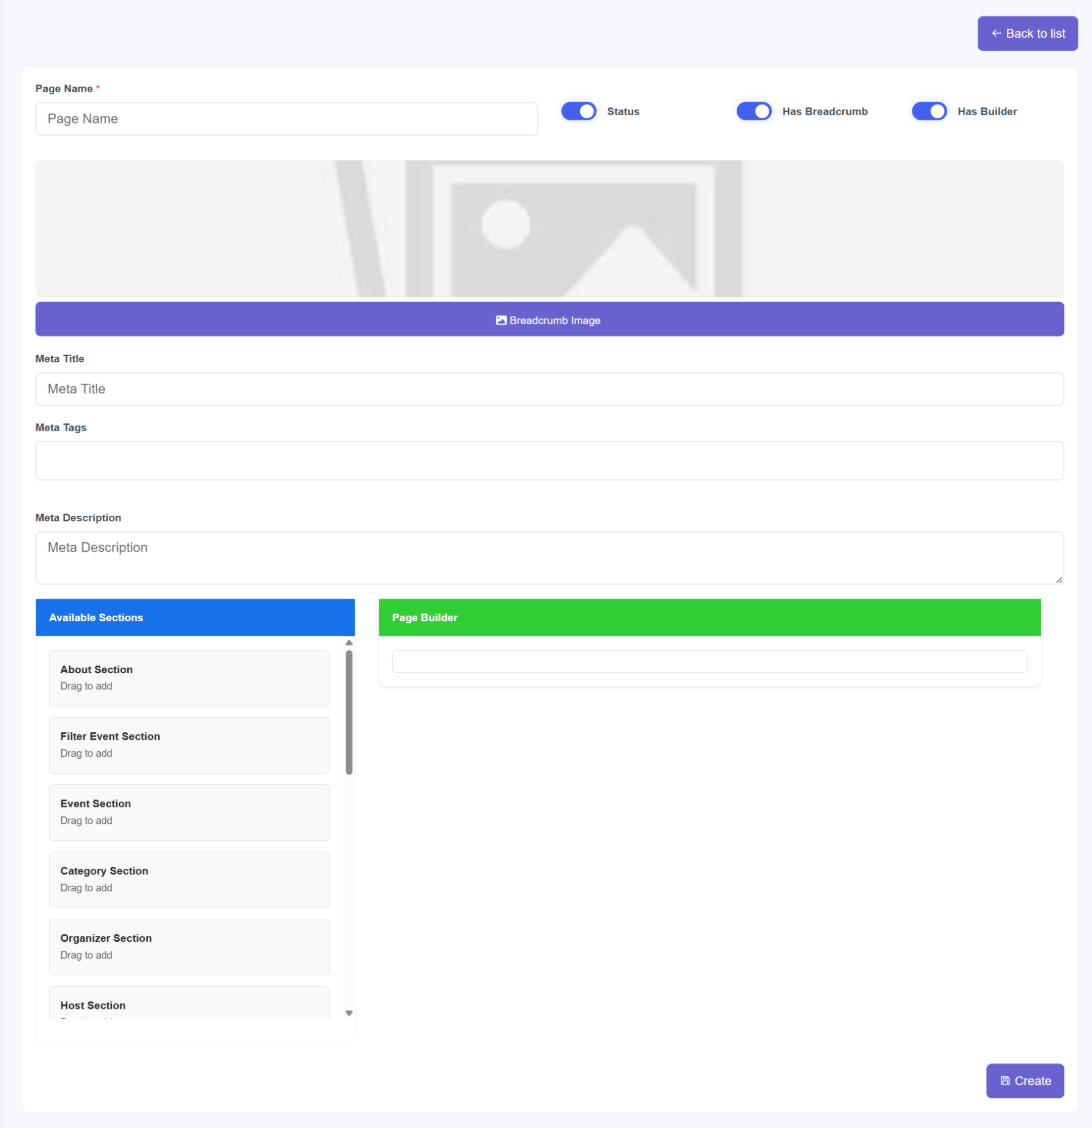
16.2 Creating and Building Pages
The creation interface is divided into core metadata configuration and a functional content builder:
- Global Settings:
- Page Name: Define the internal and external title for the page.
- Status & Breadcrumb: Toggle whether the page is active and if it should display a navigational breadcrumb with a custom Breadcrumb Image.
- Has Builder Toggle: **Critical Switch.** When enabled, the **Page Builder** is activated for modular design. If disabled, the system reverts to a standard **Text Editor** for manual content entry.
- SEO Metadata: Configure search-engine specific data including the Meta Title, Meta Tags, and Meta Description to optimize the page for search results.
- The Page Builder (Drag & Drop):
- Available Sections: A library of pre-designed modules such as About Section, Filter Event Section, Event Section, and Category Section.
- Functional Workflow: Administrators can simply **Drag to Add** sections from the available list into the **Page Builder** area to define the site layout.
17. Menu Management
The Menu Management module allows administrators to construct the platform's primary navigation header. It provides the flexibility to link to internally created pages or external URLs, and features a dynamic interface for organizing parent-child menu relationships.
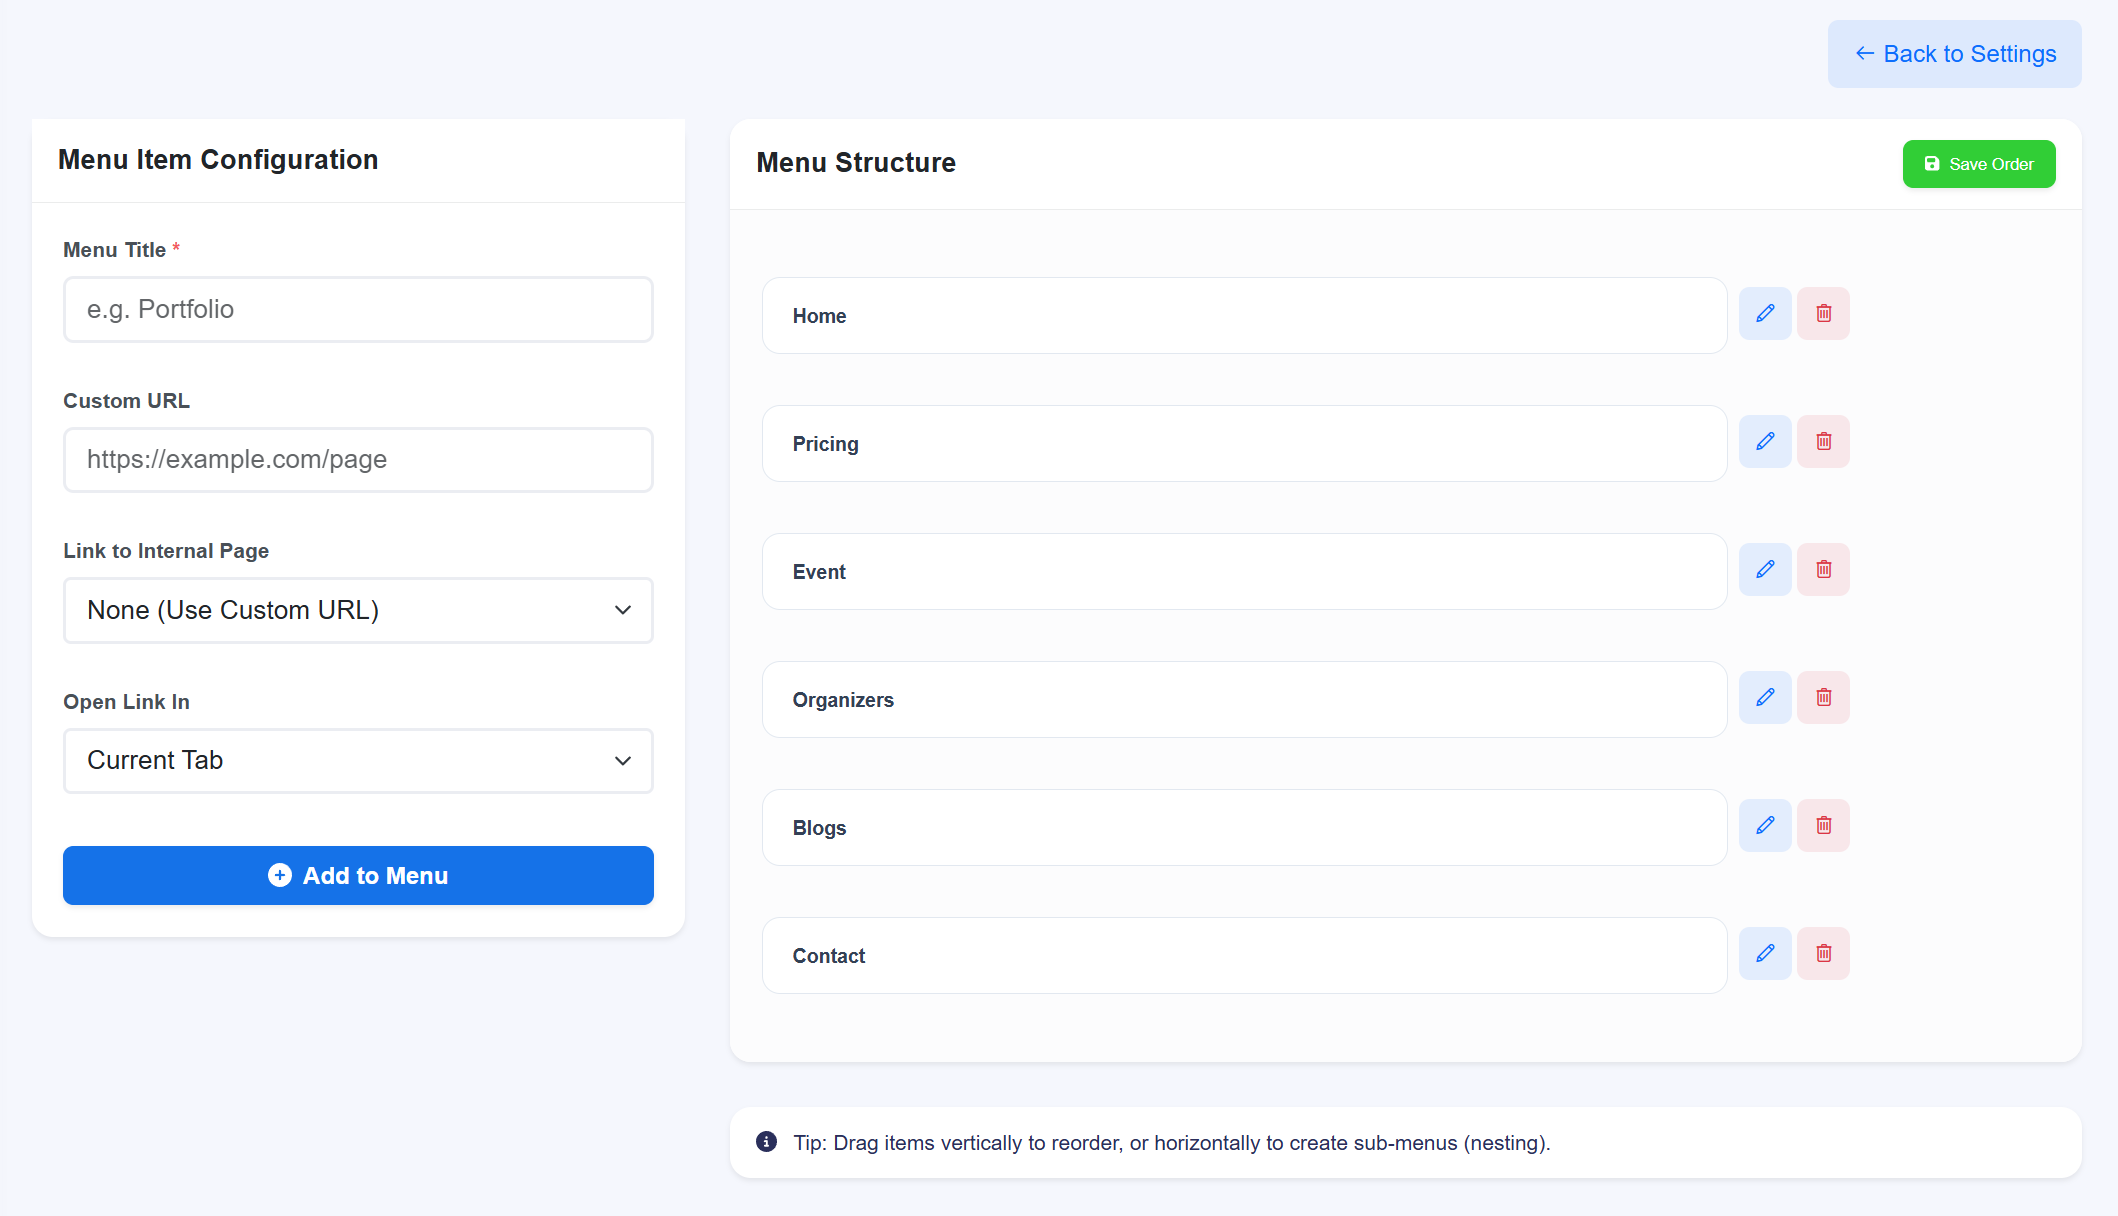
17.1 Configuring Menu Items
To add a new item to your site header, use the Menu Item Configuration panel:
- Menu Title: Enter the display name as it will appear in the header (e.g., "Our Services").
- Link Type:
- Internal Pages: Use the Link to Internal Page dropdown to select pages you previously built in the Page Module.
- Custom URLs: Select "None (Use Custom URL)" and enter a specific web address in the Custom URL field for external links.
- Target Behavior: Choose Open Link In to decide if the page opens in the "Current Tab" or a "New Tab".
- Deployment: Click + Add to Menu to move the item into the live structure.
17.2 Organizing Hierarchy & Header Display
The Menu Structure panel allows you to manage how these items are displayed to users:
- Reordering: Simply drag items vertically to change their sequence in the header.
- Creating Sub-Menus (Children): To create a dropdown menu, drag an item horizontally (to the right) underneath a parent item. This "nesting" action automatically makes it a child element.
- Modifying Entries: Use the Edit (blue pen) icon to change titles or links, or the Delete (red trash) icon to remove an item from the header.
- Finalizing Layout: After reordering or nesting, you must click Save Order to apply the new hierarchy to the website header.
5. Social Settings
Streamline the user experience by enabling social authentication. This module allows you to configure OAuth 2.0 providers, enabling users to register and log in using their existing social media profiles, which significantly increases conversion rates and reduces password-related support tickets.
Provider Integration Details